Monday, October 5, 2009

The 9-foot Monster Challah

Baked in early September by Tony Sapia at Gemelli's Bakery near Penn State
Source: Collive.com

Run for your lives!!!!!!!!!!!!!!!!!!!!!!

Most of the time when I want an expensive kitchen item, I either save up money over time (ex. KitchenAid standmixer), or I come to grips with the fact that it's just not practical enough and I'll never own it (ex. juicer). In the case of the 10-foot oven, I haven't come to grips with anything and I still really want it.

Because how else do you expect me to reproduce this 9-foot challah at home?

Source: Collive.com

A-M-A-Z-I-N-G! Monster oven remains on my wishlist. I'm not budging.

Sunday, October 4, 2009

The Recipe-Singing Band. Huh?


A band called One Ring Zero has begun a foodie project where they ask chefs for recipes and then they set the recipes to music and perform them word-for-word. Yeah, that's right: verbatim! There's no rhyme. But is there reason? Recipes as lyrics? Sounds strange. But you've got to listen to a couple of these!

Chef Michael Symon of restaurant Lola in Cleveland, who I just watched compete against three culinary students on Iron Chef America, submitted Octopus Salad with Black-Eyed Peas. The band sang the ingredients and instructions to the salad and it came off as a rock song! And no, in case you're wondering, that song title/recipe is not referring to a collaboration with will.i.am.

You can also listen to the polka-inspired "Spaghetti with Sweet 100 Tomatoes," a recipe submitted by Chef Mario Batali. Very clever.

I think my personal favorite is the creepy sounding "Lamb Shanks Roasted in Paper," recipe by Chef Jenny Morris. I can't decide if it sounds more like it belongs at a funeral or at a Jewish wedding. Kind of Klezmer-ish, but haunted, too. Have a listen and let me know how you'd describe this craziness!

Maybe the dish they're eating is going to be in a song?

I couldn't find a video of the guys singing any recipes (maybe that's a work in progress...), but here's a great clip of them in Aviles, Spain, performing "The Natty Blues," complete with accordion, guitar, and really, really neat trumpet. Am I being converted to so-called "ethno-pop"?


Maybe one day I'll be driving to work, listening to the radio, business as usual, and suddenly I'll hear the lyric: "Bring the water to a boil and then turn it down to a simmer, so the water is lightly bubbling." That's when you know the food revolution has taken over the world. :-)

Thursday, October 1, 2009

Scientific Chocolate Crinkle Cookies


Chocolate crinkle cookies are a classic. Lots of cookbooks include a version, and I have memories of these from when I was a little kid. The difference here is that this recipe was developed by a biochemist! Shirley Corriher, the cookie's mastermind, is a cooking teacher and food scientist from Atlanta, Georgia, and her tips throughout the recipe definitely make me feel like I'm doing each step for a reason.


For example, she recommends rolling each ball of cookie dough into granulated sugar before rolling it into the traditional powdered sugar and her scientific reason is so that the powdered sugar doesn't absorb into the hot-out-of-the-oven cookie and disappear once it cools. The granulated sugar acts as a shield so the powdered sugar stays white and pretty. When I made these cookies, I froze most of them in a plastic freezer bag to serve a week later. I thought for sure the powdered sugar would be gone when the cookies defrosted and the condensation destroyed the nice white coating. But nope! They remained perfectly white post-freezer. Shirley, you're a genius!


Chocolate Crinkle Cookies
Recipe by Shirley Corriher in Bakewise and republished in EveningEdge.com

1 3/4 cups plus 2 tablespoons, spooned and leveled, bleached all-purpose flour
1 1/2 teaspoons baking powder
1/2 teaspoon salt
1 1/3 cups semisweet chocolate, finely chopped
2 3/4 cups granulated sugar, divided
1/3 cup canola oil
2 tablespoons light corn syrup
2 eggs
1 egg yolk
2 teaspoons pure vanilla extract
1 cup confectioners’ sugar

In a medium bowl, beat together well flour, baking powder and salt and set aside.

Melt chocolate in the microwave on 50 percent for 1 minute, stir, and microwave for 15 seconds more and stir.

In a mixer with paddle attachment, beat 2 1/2 cups sugar, oil and corn syrup together to blend. Beat in eggs, egg yolk and vanilla. On low, beat in melted chocolate. Add flour mixture and beat in on low.

Wrap the dough in plastic and refrigerate for at least 3 hours or overnight.

Place a rack in the middle of the oven and preheat the oven to 325 degrees.

Take out about a quarter of the dough at a time to shape. Roll the dough into 1 1/2 to 2-inch balls. Pour 1/4 cup granulated sugar into one bowl and the confectioners’ sugar in another bowl. Roll each cookie dough ball very lightly in plain sugar first and then very heavily in confectioners’ sugar. By rolling in plain sugar first, the confections’ sugar does not soak in so much and stays on the surface better.

Place release foil (nonstick side up) on a baking sheet. Arrange cookies 2 inches apart. For crisp cookies, bake 12-14 minutes. You can have several sheets of foil covered with cookies ready. When one sheet is done, you can pull off the foil and cookies to a cooling rack. Rinse baking sheet with cold water to cool and then slip the sheet under a foil with cookies and get it right back into the oven.


Step-by-Step in Pictures

Mix together the sugar, corn syrup, and oil, then add the eggs and vanilla...

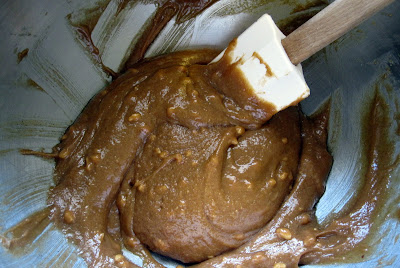
Will look just like this! Thick, yellow, and goopy...

Blend in the melted chocolate...

Add the dry ingredients and the batter will become thick...

Wrap in plastic wrap and refrigerate for several hours...

Roll out balls of dough and prepare two bowls, one for granulated, one for powdered sugar...

First roll the ball of dough in granulated sugar...
Then roll the dough in powdered sugar...
Evenly distribute on the baking sheet...

Bake at 325 degrees F until perfectly crackly!

So good! And so pretty!

Saturday, September 26, 2009

My Mom Met David Lebovitz, or OMGWTFBBQ!

My mom with David Lebovitz

You may have noticed if you've been following this blog that I am a big fan of David Lebovitz. I've made a bunch of his recipes, including this, this, this, and this. I read his blog. And I follow him on Twitter. You should, too.

So it should come as no surprise that when my mom met the man/pastry genius on Thursday at a talk/book signing hosted by Charles Chocolates in Emeryville, CA, I was jealous. And that was before I saw the above photo. Now I'm just....beside myself!

David, if you're listening, come down to LA so I can shake your hand, or serve you some Maple Walnut Ice Cream from your cookbook. Last time I made it, it was the hit of my dessert party.

Pretty please?

Thursday, September 17, 2009

No-Knead Round Challah, Perfect for Rosh Hashanah


Shana Tova! Happy New Year to my fellow members of the tribe! Rosh Hashanah is here!

I love this Jewish holiday. It's such a joyous celebration spent with family, focusing on new beginnings, a clean slate, second chances, basically, a new year! And the food is fantastic! Besides making everything with apples and honey (I'm not kidding, you can throw those two ingredients into just about anything: pasta, meatloaf, chicken, kugel, salad, cookies, etc...), another tradition is to make a round challah, symbolizing the cycle of a year or the cycle of life (and oh man, there are so many other interpretations!). When I saw this King Arthur Flour no-knead round challah recipe featured in the blog Bakers' Banter and the accompanying gorgeous photos, I had to try it.


The concept of a no-knead challah is interesting, and it's becoming increasingly popular and trendy. I had never tried it before. This specific challah recipe is actually ideal for a busy, working person who can't put together a traditional loaf of bread in the evening after work unless she wants to be up till 1 in the morning. Kneading, plus two rising times, plus baking, means one really late night. But with this recipe, you make the dough, let it rise for about 2 hours, and then it goes into the fridge overnight! You take it out the following night, shape it, let it rise another 90 minutes, and then bake it! A two day process works perfectly for my busy schedule!

As you'll see in my photos, the challah grew A LOT during the rises and baking! More than in the photos from Bakers' Banter. Maybe I have superhero super active yeast. Still, without comparing it to anything, it's a gorgeous, regal loaf. And I'm patting myself on the back for successfully making a yeast bread without kneading it at all. The urge was there but I resisted!


No-Knead Challah
Recipe from King Arthur Flour

Dough
6 3/4 cups or 7 3/4 cups King Arthur Unbleached All-Purpose Flour*
1 tablespoon + 1/2 teaspoon salt
1 1/2 tablespoons instant yeast
1 1/2 cups lukewarm water
4 large eggs
1/2 cup honey
1/2 cup melted butter or vegetable oil
*See step #1, below.

Topping
1 egg (any size) beaten with 1 tablespoon cold water
2 to 3 tablespoons sesame seeds or poppy seeds, optional

1. The flour/liquid ratio is important in this recipe. If you measure flour by sprinkling it into your measuring cup, then gently sweeping off the excess, use 7 3/4 cups. If you measure flour by dipping your cup into the canister, then sweeping off the excess, use 6 3/4 cups. Most accurate of all, and guaranteed to give you the best results, if you measure flour by weight, use 33 ounces.

2. To make the dough: Combine all of the dough ingredients, in the order written, in a very large bowl (at least 6 quarts). Stir to make a sticky dough. You can do this in a stand mixer and then transfer to a larger bowl; or simply use a big bowl and spoon (or dough whisk).

3. Cover the bowl, and let the dough rise for 2 hours at cool room temperature.

4. Refrigerate the dough for at least several hours, to chill it and make it easier to work with. It can be refrigerated for up to 4 days before using.

5. When you're ready to make challah, remove the dough from the refrigerator, and scoop out about one-third of the dough (about 21 ounces). Transfer it to a floured work surface; a silicone mat works well here.

6. Divide the dough into three pieces, and shape each piece into a log about 24" long.

7. Braid the logs, pinching the strands together at each end.

8. Lightly grease an 8" x 2" round cake pan. It's important that the pan is at least 2" deep. If it's not use, a 9" round pan. Coil the braid into the pan.

9. Cover the pan, and allow the braid to rise for about 90 minutes, till it's quite puffy. Towards the end of the rising time, preheat the oven to 350°F.

10. Uncover the challah, and brush it with the egg/water mixture. Sprinkle with seeds, if desired.

11. Bake the challah for 30 to 35 minutes, till it's golden brown and an instant-read thermometer inserted into the center registers at least 190°F.

12. Remove from the oven, and carefully turn out of the pan onto a rack to cool.

Yield: one 9" round braid. The entire recipe will make 3 loaves.


Step-by-Step in Pictures

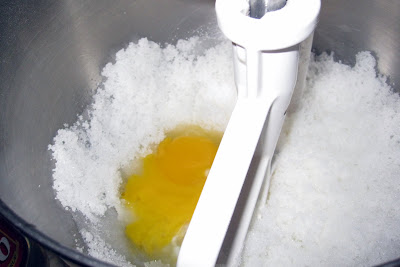
Combine all ingredients for the dough into a mixing bowl...

Mix until a sticky mass forms...

Place in a bowl, cover, and let rise about 2 hours...

Here's the dough after 2 hours of rising...

Then place in the fridge overnight...

Next night, take the dough out of the fridge and divide into 3 portions...

Roll out each of the braid strands to 24 inches long...

To braid, I start from the center and work out from both ends. This ensures the braid will be evenly-thick, rather than thick at one end and tapered at the other.

There's nice even braiding...

Transfer the braid to a well-greased round pan...

Cover and let rise until puffy, about 90 minutes...

Just before baking, add the egg wash and sesame or poppy seeds...

Bake for at least 35 minutes...

Gorgeous loaf hot out of the oven!

Wednesday, September 9, 2009

Peanut Butter Chocolate Chip Bars


I'm a big time fan of a blog called The Chocolate Peanut Butter Gallery. It is anything and everything devoted to that amazing combo. My favorite ice cream flavor at Baskin Robbins is Peanut Butter 'n Chocolate. My favorite candy from Charles Chocolates is the Peanut Butterfly (chocolate enrobing a peanut butter filling). Reese's Peanut Butter Cups were always my favorite Halloween candy as a child. When I go to Crumbs Bake Shop in Beverly Hills, the only cupcake I ever order is the Peanut Butter Cup. I hold a very special place in my heart for chocolate combined with peanut butter. And more to the point, I have a major weakness for it.

These Peanut Butter Chocolate Chip Bars come from a Chocolatier Magazine cookbook. Say no more! They are chewy and gooey and peanutbuttery and exactly what I, as a chocolate peanut butter worshiper, am looking for. If you belong to that camp, too, then indulge yourself and make these. They are incredibly easy to prepare and use basic ingredients you're bound to have handy.

Sure, the saying goes, "Everything in moderation." It's a good rule to live by, so fine, I don't plan to die from a chocolate peanut butter overdose. But a temporary food coma works for me.


Peanut Butter Chocolate Chip Bars
Recipe by Mary Goodbody and the editors of Chocolatier Magazine in Glorious Chocolate

1 1/3 cups all-purpose flour
1 teaspoon double-acting baking powder
1/4 teaspoon baking soda
1/4 teaspoon salt
2/3 cup extra-chunky peanut butter
4 tablespoons (1/2 stick) unsalted butter, softened
1 cup packed light brown sugar
2 large eggs, at room temperature
1 teaspoon vanilla extract
6 ounces (about 1 cup) semisweet chocolate chips

1. Position a rack in the center of the oven and preheat to 350 degrees F. Line a 9-inch square baking pan with aluminum foil so that the foil extends 2 inches beyond two opposite sides of the pan. Lightly butter the bottom and sides of the foil-lined pan.

2. In a small bowl, stir together the flour, baking powder, baking soda, and salt.

3. In a large bowl, using a hand-held electric mixer set at medium-high speed, beat the peanut butter, butter, and brown sugar for 2 to 3 minutes or until well combined. Beat in the eggs and vanilla. Using a wooden spoon, stir in the flour mixture until just combined. Sir in the chocolate chips. Scrape the batter into the prepared pan and spread evenly.

4. Bake for 25 to 30 minutes or until a cake tester or toothpick inserted into the center of the pan comes out with a few moist crumbs clinging to it. Do not overbake the brownies. Cool in the pan on a wire rack for 30 minutes. Using the two ends of the foil as handles, lift the bars out of the pan. Leaving the bars on the foil, cool on the wire rack for at least 2 hours. Invert the bars onto a plate and carefully peel off the foil. Invert again onto a smooth surface and cut into 12 bars. Store the bars in an airtight container.

Yield: 12 bars.


Step-by-Step in Pictures

Combine dry ingredients in a bowl...

In a mixing bowl, cream the peanut butter, butter, and brown sugar together...

It will look like this delicious batter (which tastes amazing but I promise it's worth continuing on with the recipe!)...

Add the eggs and vanilla...

Now the batter is becoming more goopy and ribbony...

Fold in the dry ingredients (do not overmix)...

The batter will become thick...

Stir in the chocolate chips...

Spread the batter into a greased, foil-lined pan...

Bake at 350 degrees F for about 25 minutes (my speedy gonzalez oven required only 22 minutes)

And here you go!

Full of peanut butter flavor! And the chocolate chips stay soft and melty!
Related Posts with Thumbnails