Showing posts with label candy. Show all posts

Sunday, July 1, 2012

Stovetop Crispy Corn Flake Chocolate Peanut Butter Bars


If you are a peanut butter fan, this bar is for you! I can comfortably make that claim because I served it to a bunch of peanut butter lovers and they all had glowing assessments. One said, "I think you need to add this to your regular repertoire." Another said, "I really shouldn't have seconds but I'll make an exception this once! Darn you, Marni!" And another asked, "When is this going up on the blog!?!?!?!?!"


I love that it's a no-bake, stovetop-only bar. Put a couple ingredients in a saucepan, stir corn flakes in, spread the mixture into a foil-lined pan, and cover with melted chocolate and chopped peanuts. The bars never go in the oven. They just chill in the fridge for a few hours. Easy as pie, er, bars! And if you store the leftovers in the fridge (uhhhh, what leftovers?), the corn flakes seem to stay crispy for days! GREAT SUCCESS! GREAT SUCCESS!

Since these corn flake bars remind me a lot of a rice krispy bar, I'm kind of curious to try the exact same recipe using a different cereal next time. Though as they say, if it ain't broke, don't fix it! And these do not need fixing! A+!

Shabbat Note: It would be very easy to make these pareve for Shabbat. Simply use margarine instead of butter and use pareve bittersweet, dark, or semi-sweet chocolate for the top layer.


Stovetop Crispy Corn Flake Chocolate Peanut Butter Bars
Adapted from a recipe by Yvonne Ruperti in Serious Eats
Makes 16 hefty bars

4 tablespoons (1/2 stick) unsalted butter
1 cup creamy peanut butter
1/2 cup light corn syrup
1/3 cup light brown sugar
Pinch salt
4 cups corn flakes, lightly crushed
1/3 cup salted peanuts, chopped and divided (from the 1/3 cup measure, pour into a 1/4 cup measure and leave the remaining nuts in the 1/3 cup)
1 teaspoon pure vanilla extract
4 ounces bittersweet chocolate, finely chopped (or chocolate chips)

Line an 8x8-inch baking pan (or a 9x9-inch but the squares will not be as tall) with foil so that some foil hangs over the edge on two opposite sides (for pulling up the bars later).

In a medium or large saucepan over low-medium heat, melt butter. Add peanut butter, corn syrup, brown sugar, and salt and stir until all melted and smooth. Remove from the heat.

Stir in corn flakes, 1/4 cup peanuts, and vanilla until just combined. Pour into prepared pan and smooth top with the back of a spoon.

In the top of a double boiler over simmering water (or simply using the microwave), heat chocolate until just melted (if using microwave, be very careful not to burn the chocolate and heat just long enough to warm the chocolate pieces so you can stir them to melt them). Spread chocolate over top of corn flake mixture using offset spatula. Sprinkle with remaining chopped peanuts. Cover and chill until firm, about 2 hours. Remove from pan using the foil overhangs and cut into 2-inch squares. Or if you're like me, cut them into bite size pieces. A little goes a long way!


Step-by-Step in Pictures
In a saucepan, heat together the butter, peanut butter, corn syrup, brown sugar, and salt. Remove from the heat.

Add the corn flakes, 1/4 cup chopped peanuts, and vanilla and stir until everything is combined...

Pour this corn flake filling into the prepared pan and use the back of a spoon to smooth the top...

Melt chocolate and spread over the corn flake mixture in the pan...

Sprinkle with the remaining nuts, cover with foil, and chill in the fridge for at least 2 hours...

Once chilled, slice and serve!

Friday, September 30, 2011

Peanut Butter Butterfinger Cookies


Believe it or not, I am still using up the chopped candy pieces I acquired from the birthday party my friend hosted for her husband back in April. She had an ice cream-themed party with a gazillion toppings so you could build your own amazing sundae. At the end of the party, she sent me home with lots of the leftover toppings, not knowing what to do with them. I've been having a blast baking with them or snacking on them plain. Already used up the Oreos, Kit Kats, M&Ms, and mini peanut butter cups.


This time around, I took her crushed Butterfingers and decided to add them to a peanut butter cookie. And not just any peanut butter cookie. David Lebovitz's. I added some vanilla to his recipe, tossed the crushed Butterfingers in at the last minute, and shaped the dough into cookie logs so I could slice and bake. Oh man, these cookies are amazing. They are chewy and peanut buttery, and then they have these baked Butterfinger bits in them that add some caramelized crunch. I could not be happier with the result!


Peanut Butter Butterfinger Cookies
Adapted from a recipe by David Lebovitz in Ready for Dessert
Makes 30 cookies

1 1/4 cups all-purpose flour
1 tablespoon baking powder
1/4 teaspoon salt
1/2 cup (1 stick) unsalted butter, melted
1/2 cup granulated sugar
1/2 cup packed light brown sugar
1 cup creamy peanut butter (not natural; I used Skippy)
1 teaspoon vanilla extract
1 large egg, at room temperature
1 cup chopped Butterfingers (this is a rough estimate; feel free to use more or less!)

In a small bowl, whisk together the dry ingredients (flour, baking powder, and salt). Set aside.

In a stand mixer or large bowl with hand mixer, beat the butter, both sugars, and peanut butter together on medium speed until smooth. Blend in the vanilla and egg. Add the dry ingredients and mix just until incorporated. Stir in the chopped Butterfingers.

Leave in the bowl, covered, or shape the dough into a couple of logs wrapped in plastic wrap. Then chill in the fridge for at least 2 hours or overnight. You can also freeze the cookie dough logs in Ziploc bags to make cookies at a later date.

When you're ready to bake, preheat the oven to 350 degrees F. Line 2 baking sheets with silicone baking mats or parchment paper. Drop balls of dough onto the baking sheet or slicing the logs into approximately 1/2-inch thick discs and space evenly apart. Use a fork to flatten the tops of the cookies. Bake for 8 to 10 minutes, rotating the sheets front to back and top shelf to bottom shelf halfway through baking. The cookies will look slightly underdone, but start to look golden around the edges. Underdone is the key to chewy cookies!!

Cool the cookies on the baking sheets for 10 minutes, then transfer to cooling racks.


Step-by-Step in Pictures
Whisk together the dry ingredients and set aside...

In a large bowl, beat together the butter, sugars, and peanut butter...

Blend in the egg and vanilla...

Stir in the dry ingredients...

Stir in the Butterfinger bits...

Mix just until incorporated...

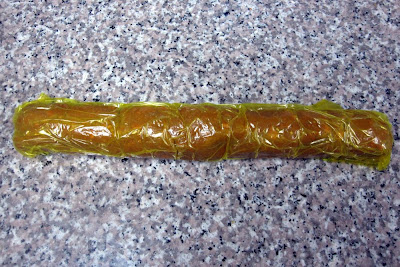
Shape into cookie dough logs and wrap in plastic wrap. Chill in the fridge for at least 2 hours, or freeze in a Ziploc bag...

If you're going to freeze to bake at a later time, be sure to include some instructions on the Ziploc bag so you'll know how to finish off the baking!

When you're ready to bake, slice the log into discs...

Place the discs evenly apart on a baking sheet, then press down with a fork to create a crosshatch design...

Bake at 350 degrees F for 8-10 minutes. Err on the side of underbaking them...

Yummo!!

Monday, July 4, 2011

Chocolate Chip Cookie Dough Truffles


GASP! SHOCK! AWE! BEHOLD! A cookie dough truffle! Why haven't I heard of this before?! And for all you raw-egg-freaker-outers, there are no eggs in this cookie dough so don't get your panties in a bunch. Instead of eggs to bind the dough together, you use sweetened condensed milk!


Go crazy with topping choices. I opted for brightly-colored star sprinkles and some white chocolate that I melted and placed into a piping bag for a few more designs. The effect is so cool! For the 4th of July (Happy Independence Day to you!), try red, white, and blue candies, sprinkles, or dyed white chocolate. These would be festive and perfect to celebrate the holiday.


The truffles set up in a short time and then look really elegant and fun. And one of the best ways to customize this is, if you already have a favorite chocolate chip cookie recipe, feel free to use that dough instead of this one. Just replace egg with sweetened condensed milk. Voila.


Cookie Dough Truffles
Adapted from a recipe on FoodNetwork.com that was featured on Paula's Best Dishes, Episode: Sweet Somethings
Makes 5 dozen truffles

1/2 cup (1 stick) unsalted butter, softened
3/4 cup firmly packed brown sugar
1 teaspoon vanilla extract
2 cups all-purpose flour
1 (14-ounce) can sweetened condensed milk
1/2 cup semisweet mini chocolate chips (it's important they are mini!)
Semisweet chocolate for melting (I used a LOT, maybe 18 ounces or more?)

In a large bowl using an electric mixer on medium speed, cream together the butter and brown sugar. Add vanilla. Gradually beat in flour on low-medium speed (unless you want flour in your face). Then add the can of sweetened condensed milk. Add mini chocolate chips and mix until well combined. Chill the dough, covered, in the fridge for about an hour. Shape into 1-inch balls. It helps to use a cookie dough scoop to get evenly sized balls. Place on wax paper-lined baking sheet; chill 2 hours. You want the balls really firm before you roll them in the melted chocolate.

Melt chocolate in a glass bowl and place the bowl over a hot water bath so the chocolate stays liquidy and melty. Otherwise, you'll find yourself constantly microwaving the bowl of chocolate and huffing and puffing. Drop a cookie dough ball into the melted chocolate, turn to coat completely with a spoon. Lift up using a fork, thin spatula (such as metal offset spatula), or specialty dipping tool, shaking any excess chocolate off. Place on a wax paper-lined baking sheet. While the chocolate is still setting, top with desired sprinkles so they'll stick. If you want to pipe melted white chocolate on top instead of sprinkles, it's not as critical that you decorate right away because the white chocolate will stick no matter what. Once the baking sheet is filled, place in the fridge to chill and completely set the truffles. This takes about an hour. Then they're ready to serve!


Step-by-Step in Pictures
Cream together the butter and brown sugar...

Add the vanilla...
Add the flour...
Add the sweetened condensed milk...

Stir in the mini chocolate chips, then chill in fridge...
Shape into 1-inch balls of dough and return to fridge to chill...
Dip the balls in melted chocolate, then top with sprinkles...

Or decorate with melted white chocolate in a piping bag...

Chill the truffles in the fridge to set the chocolate completely, then enjoy!

Wednesday, April 20, 2011

Caramel Matzah Crunch Ice Cream: A Passover Dream Come True


Oh yes I did. I just put two of my favorite things (and I know they are also favorites for many of you!) together and it's all kosher-for-Passover!

You can call me a hero. Start celebrating a Happy Go Marni Day in your city. Post cardboard cut outs of me on your lawn. Write me onto the next presidential ballot. I just made Passover dessert more than simply tolerable! Hip Hip Hooray!


Made-from-scratch vanilla bean ice cream gets a Passover-themed flavor enhancement with the addition of tiny pieces of caramel matzah crunch, that chocolate caramel-covered matzah candy that the world can't live without on Passover. A-mazing! Both of these things are things I've blogged about separately before. So all they needed was a little love and marriage.


I knew I wanted to make ice cream for Passover, but I thought it would be more special if it had a distinctly Passover feel to it. I can't toss in regular candy pieces because of the corn syrup or other no-no ingredients. But caramel matzah crunch is something I make annually regardless, and broken up into tiny pieces, they resemble toffee bits! Sort of like Skor or Heath Bar bits.

The result is an ice cream that feels special for the holiday, but if you don't finish the batch by the end of Passover, it's perfectly delicious to continue consuming post-Passover. And you can't say that's true for a lot of other leftover desserts you might have when Passover ends. I see you through the computer screen, nodding in agreement. Try this!


Caramel Matzah Crunch Ice Cream
This recipe is my (very) successful attempt to marry Caramel Matzah Crunch by Marcy Goldman and Philadelphia-Style Vanilla Ice Cream by David Lebovitz
Makes about 1 1/2 quarts

3 cups heavy cream, or 2 cups heavy cream and 1 cup whole milk (honestly, 1% will work fine)
3/4 cup sugar
Pinch of salt
1 vanilla bean, split in half lengthwise
3/4 teaspoon Passover vanilla extract
Approximately 1 1/2 cups Caramel Matzah Crunch, broken up into little 1/2-inch pieces (see recipe below)

Pour 1 cup of the cream into a medium saucepan and add the sugar and salt. Scrape the seeds from the vanilla bean into the saucepan and add the pod to the pot. Warm over medium heat, stirring, until the sugar is dissolved.

Remove from the heat and add the remaining 2 cups cream (or the remaining 1 cup cream and the milk) and the Passover vanilla extract.

Chill the mixture thoroughly in the refrigerator overnight. When ready to churn, remove the vanilla bean, rinsing and reserving it for another use. I recommend straining the mixture into a new bowl because there might be tiny pieces of bark from the vanilla pod that you don't want in the ice cream. Then churn the mixture in your ice cream maker according to the manufacturer's instructions.

During the last 3-5 minutes of churning, when the mixture is pretty thick and almost of perfect consistency for soft serve ice cream, pour in the caramel matzah crunch bits and let the ice cream maker incorporate all the pieces. Transfer the ice cream to freezer containers and freeze for a few hours before serving to allow the ice cream to firm up a bit.


Caramel Matzah Crunch
4-6 unsalted matzahs
1 cup (2 sticks) unsalted butter or unsalted Passover margarine
1 cup firmly packed brown sugar
3/4 cup coarsely chopped chocolate chips or semi-sweet chocolate

Preheat the oven to 375°F. Line a large (or two smaller) cookie sheet completely with foil. Cover the bottom of the sheet with baking parchment — on top of the foil. This is very important since the mixture becomes sticky during baking.

Line the bottom of the cookie sheet evenly with the matzahs, cutting extra pieces, as required, to fit any spaces.

In a 3-quart, heavy-bottomed saucepan, combine the butter or margarine and the brown sugar. Cook over medium heat, stirring constantly, until the mixture comes to a boil (about 2 to 4 minutes). Boil for 3 minutes, stirring constantly. Remove from the heat and pour over the matzah, covering completely.

Place the baking sheet in the oven and immediately reduce the heat to 350°. Bake for 15 minutes, checking every few minutes to make sure the mixture is not burning (if it seems to be browning too quickly, remove the pan from the oven, lower the heat to 325°, and replace the pan).

Remove from the oven and sprinkle immediately with the chopped chocolate or chips. Let stand for 5 minutes, then spread the melted chocolate over the matzah. Chill, still in the pan, in the freezer until set. Break into squares or odd shapes.


Step-by-Step in Pictures
Note: Additional photos can be found on my original posts for Caramel Matzah Crunch and Philadelphia Style Vanilla Ice Cream.

After the ice cream mixture has chilled in the fridge overnight, remove it from the fridge...

Strain the mixture into a new bowl to catch the vanilla pod and any tiny pieces of vanilla bark...

Pour into the ice cream maker...

When the ice cream is almost done, and thick but still moving easily in the machine, pour in the Caramel Matzah Crunch bits...

Churn with the candy bits for about 3 minutes, until fully incorporated...

Transfer to a freezer container and place in freezer to allow the ice cream to firm up...

Scoop and serve! You are in for a real Passover treat!
Related Posts with Thumbnails