Showing posts with label muffins. Show all posts

Monday, January 13, 2014

Corn Dog Muffins: Bringing the County Fair to Your Kitchen!


To all my fellow corn dogs, have I got a great recipe for you! Corn Dog Muffins! Who doesn't love corn dogs? They're so familiar, so homey, so nostalgic. And these days, you can buy vegetarian and even vegan corn dogs in mainstream grocery stores. They're a popular food item!

I was browsing Pinterest one afternoon and saw someone pin a recipe for Corn Dog Muffins. I couldn't believe my eyes. It combined a food I love (corn dogs!) with a shape I love (muffins!). And in particular, mini muffins.

If you ask my family, they'll all tell you that I make everything tiny. I prefer making my cookies bite-size, cutting my brownies and blondies into tiny morsels, shaping bread rolls into small rolls, and using a mini muffin pan for everything from mini muffins (duh) to mini quiches, mini appetizers, and mini cheesecakes. I don't know if it's that I like to be able to eat the whole thing in one bite, or if I think mini just looks cuter, or if I feel like I can justify eating the whole thing because it's a smaller portion size (which doesn't really work in the end because I end up eating more than one), but whatever the reason, I'm obsessed with mini treats. The idea of reshaping a corn dog into a mini muffin is, therefore, pure brilliance.

It just so happened that we had a bunch of leftover uncooked hot dogs in the fridge from a recent barbeque. We had purchased a gigantic package from Costco and figured we'd find a way to use up whatever wasn't eaten that day. Well, turned out we had so many leftover hot dogs after the barbeque that we would be eating hot dogs for a long time if we didn't find a recipe or two that involved them. So, we not only made corn dog muffins, but another hot dog-themed dish that I hope to blog about soon! And we even tossed leftover hot dog slices into some quinoa one night. Sounds weird, but made for a great dinner! Good thing I really like hot dogs.

If you don't feel like making the batter from scratch, I bet a corn bread or corn muffin mix would work just fine, and follow the instructions for placing a hot dog slice on each muffin cupful of batter. And if you are vegetarian, or you keep kosher, use fake meat hot dogs (since the corn bread batter calls for buttermilk). This recipe made a LOT of mini muffins...far too many to eat in one sitting without a tummy ache. So we enjoyed them for a few more days to go along with lunch or dinner. To serve warm and re-crisp them (which is definitely the way to go), simply place the muffins in the toaster oven on a foil-lined tray for a few minutes. Works like a charm!

This is for all you kids out there. And by kids, I mean everyone.


Corn Dog Muffins
Recipe adapted from The Pioneer Woman
Makes 36-48 mini muffins or 12-18 standard muffins

1/4 cup vegetable shortening, melted and cooled
1 cup yellow or white cornmeal (I used white!)
1/2 cup all-purpose flour
1 teaspoon salt
1 tablespoon baking powder
1/2 teaspoon baking soda
1 cup buttermilk, at room temperature (I used Saco Buttermilk Powder)
1/2 cup milk, at room temperature (I used nonfat milk powder and it worked great!)
1 egg
4-6 hot dogs, sliced (see note in recipe instructions below for size of slice)

Preheat oven to 425 degrees F.

Combine cornmeal, flour, salt, baking powder, and baking soda in a large mixing bowl. In a separate, medium size bowl, combine buttermilk, milk, and egg. Add the wet ingredients into the dry ingredients and stir with a whisk until incorporated. Add the melted shortening to the batter and stir until the batter is smooth. Be sure the shortening has cooled off first or it will clump up into solid bits from attempting to mix with colder ingredients.

Grease or spray muffin pans. If using mini muffin pans, you'll probably need two pans of 24 cups each. If using standard muffin pans, you'll probably only need 1 pan of 12 cups. I made mini-sized. Fill each muffin cup a little more than half full. Drop one piece of hot dog in the center of each muffin cup. (For mini muffins, cut up the hot dogs into about 1/4-1/2-inch rounds and you'll probably only need 4 or 5 hot dogs; if using standard muffin pans, cut hot dogs into 1-inch slices and you might need all 6 hot dogs ).

Bake the muffins until the cornbread looks done and slightly golden on top, about 11-15 minutes. You want that crispy outside edge so it resembles a corn dog! Remove from the pan and serve warm with ketchup and mustard!


Step-by-Step in Pictures
Combine cornmeal, flour, salt, baking powder, and baking soda in a large bowl. Set aside.

Whisk the egg...

Add the buttermilk and milk to the egg, then add this wet mixture to the dry ingredients, then stir in the melted shortening...

Fill each greased muffin cup a little more than half full...

Chop up the hot dogs...

Carefully place a hot dog piece into the center of each muffin cup. Bake at 425 degrees F for 11-15 minutes, until golden...

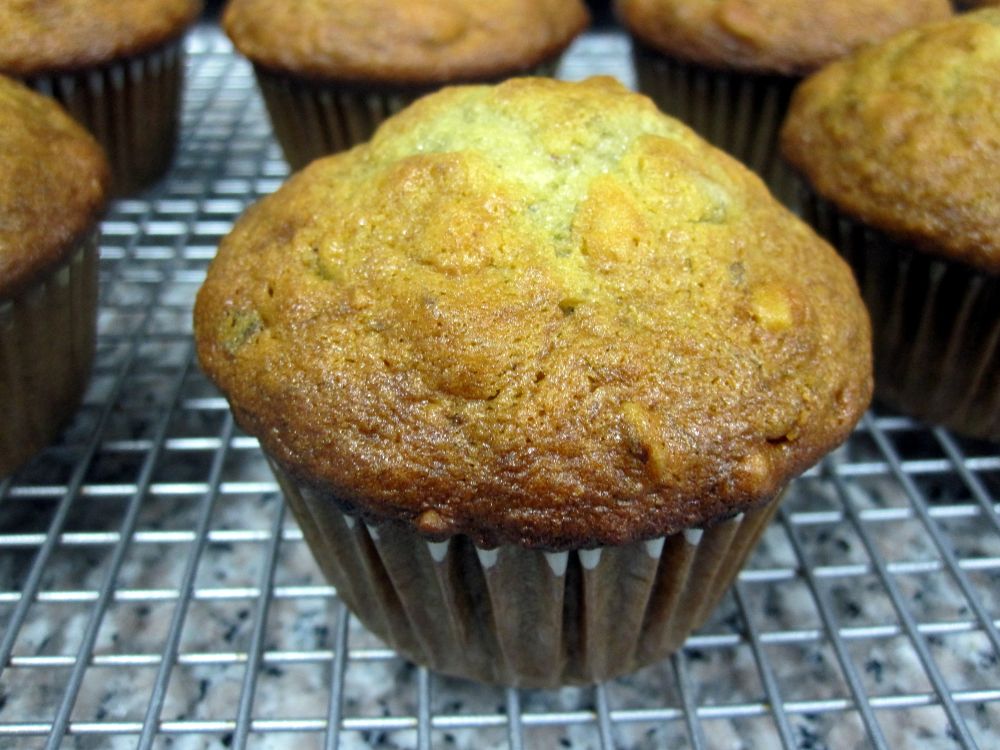
Remove from the pan and allow to cool on a wire rack for a few minutes...

Dunk the corn dog muffin in ketchup and enjoy!

Sunday, November 3, 2013

Blueberry Buttermilk Bran Muffins: The Triple B!


After a bit of an unplanned 5-month hiatus from the blog (read this), I'm back and ready to share more baking stories with you!


First stop on the Happy Go Marni Returns Choo Choo Train are these delicious, hearty blueberry buttermilk bran muffins! My favorite thing about them is the use of coconut oil. It adds a really great texture and flavor to an already classic baked good, and seems to make the muffins a little sweeter than using just boring vegetable oil. Feel free to play around with different combinations of flour. I used a combination of white whole wheat flour and regular all-purpose flour. You could also go for some pure whole wheat flour, but be forewarned that it will be a denser, heavier muffin.


Lucky for most of us, even if you can't find fresh blueberries in the store or it's not the right season, blueberries are available frozen year-round, and work great in baked goods. You don't even have to thaw them; just toss the frozen berries into the batter and they bake into delicious, plump bursts of juice. You can also buy tons of fresh blueberries when they are in season, and then freeze them yourself for the off-season.

I made a lot of people really happy with these muffins. I hope you try them and enjoy them as much as my taste-testers all did!


Blueberry Buttermilk Bran Muffins
Adapted from a recipe in The Kitchn
Serves 12

2 eggs
1 1/2 cups buttermilk
1/2 cup coconut oil, melted and slightly cooled (although still liquid)
1 1/2 teaspoons kosher salt
2 teaspoons baking soda
2 teaspoons vanilla extract
1 tablespoon fresh lemon zest
3/4 cup sugar
2 cups bran cereal (such as All-Bran)
1 1/4 cups white whole wheat flour (or whole wheat flour)
1 cup all-purpose flour
2 cups fresh or frozen blueberries (if using frozen, do not thaw first)
1 cup pecan halves, optional (for the tops)

Preheat the oven to 350°F. In a large bowl or a stand mixer, whisk together the eggs, buttermilk, coconut oil, salt, baking soda, vanilla extract, lemon zest, and sugar. Add the bran cereal and flours (whatever combination of flour you choose), and mix until thoroughly incorporated. Do not overmix or your muffins will bake into a dense brick...blech. Finally, gently fold in the blueberries, and again, don't overmix (if you stir too much, your batter will become an ugly grey color).

Line 12 standard muffin cups with paper liners or grease/spray each cup. Fill each cup all the way to the top. Place some pecan pieces on the top of each muffin cup. Bake for about 25-30 minutes, or until the tops are firm and a light golden brown. I found that 28 minutes was the perfect baking time for my oven. Remove from the oven and let cool for 15 minutes before removing muffins from the pan. Serve at room temperature or warm. Store at room temperature in an airtight container for up to 3 days, or store in the fridge to last a few extra days.


Step-by-Step in Pictures
Mix together the eggs, buttermilk, coconut oil, salt, baking soda, vanilla, lemon zest, and sugar...

Add the bran cereal...

Add the flour...

Gently fold in the blueberries...

Stir just until combined, but do not overmix...

Fill each muffin cup all the way to the top and scatter some pecan pieces on top...

Bake at 350 degrees F for 25-30 minutes. Cool in the pan for 15 minutes, then remove to a wire rack...

Enjoy!

Sunday, April 28, 2013

Peanut Butter Chocolate Chip Muffins: Breakfast or Dessert?


My aunt and uncle gave me a cookbook for my birthday back in January called Peanut Butter Sweets, and every single recipe in the book uses peanut butter. They know the way to my heart (or is it mouth or stomach?).

So, one recent sunny Sunday afternoon, I was craving a peanut butter snack, as is often the case, and I decided to head to my peanut butter cookbook. I had all the ingredients on hand to make these simple and totally scrumptious peanut butter muffins. I added chocolate chips to them because the only thing better than peanut butter is when you pair it with chocolate.


I cut into a muffin, hot out of the oven, and it not only took care of my craving, but it was impressively moist and peanut buttery, with chocolate chips that were ooey gooey, and a cross section featuring a perfect crumb. And that makes it something I'd do again without hesitation.

Thank you, Aunt Debbie and Uncle Phil, for the cookbook!

And now to stump you with what's stumping me, I must ask, is a peanut butter chocolate chip muffin a breakfast item? Or a dessert?


Peanut Butter Chocolate Chip Muffins
Adapted from a recipe by Pamela Bennett in Peanut Butter Sweets
Makes 12 large muffins or 36 mini muffins

2 cups all-purpose flour
1/2 cup sugar
2 1/2 teaspoons baking powder
1/2 teaspoon salt
1/2 cup smooth peanut butter (I recommend using Skippy rather than a natural brand)
2 tablespoons butter at room temperature
1 cup milk
2 eggs
1 1/4 cups chocolate chips

Preheat the oven to 400 degrees F. Line a muffin tin with paper liners or grease or spray each cup. I prefer greasing the cups over using paper liners.

Sift together the flour, sugar, baking powder, and salt. Transfer these dry ingredients to the bowl of a stand mixer. Add the peanut butter and butter and beat just until you see coarse crumbs forming. Add the milk and eggs and mix just until well combined. Don't overmix. Gently stir in the chocolate chips. The batter will be thick and gloppy.

Spoon the batter into the prepared muffin cups, filling each cup 3/4 full. Bake for about 15 minutes.


Step-by-Step in Pictures
Add the sifted flour, sugar, baking powder, and salt together in the bowl of a stand mixer and stir together...

Add the peanut butter and butter and blend...

Once coarse crumbs form, stir in the milk and eggs...

But don't overmix!

Gently stir in the chocolate chips...

Fill each greased muffin cup about 3/4 full...

Bake at 400 degrees F for about 15 minutes until a toothpick inserted in the center comes out clean...

Enjoy!

Sunday, March 25, 2012

The Best Banana-Walnut Muffins I've Ever Had in My Entire Life. Seriously.


I can honestly say this is the best banana-walnut muffin I have ever had. And that's a very strong statement I don't take lightly. But it's the truth, and how rude would it be for me to keep such a truth from you!

My mom made this recipe first and then called me up after she tasted one of her wares. She was in shock and awe at the delightful muffin of perfection she had created. She couldn't get over it. I'm not even sure she had finished her second bite when she called to tell me. It was that big of a deal what she had discovered. I asked her where she got the recipe and she said it was a Williams-Sonoma cookbook and Beth Hensperger was commissioned to do the recipes for it. That meant something to me since I own several of Beth Hensperger's cookbooks and she is one of the best cookbook authors I know. I said to my mom, "Is that the one with the dark blue cover?" "Yup," my mom replied. I knew which one it was. Out of the thousand cookbooks I owned, I could picture the cover of this one in my head. And how lucky for me that I had a copy! I mean, it's not like my mom and I overlap exactly on which cookbooks we each own.


So with three bananas getting ripe just days after my mom made this important discovery, there was only one thing for me to do. I set out to see if I could recreate my mom's perfect experience. I made the recipe. And Oh. My. Gawd. Holy Muffin of Muffins. It truly is the best banana-walnut muffin I have ever tasted in my life. I don't know if I'll ever find a better one. No longer will bakery muffins suffice. This has ruined all others for me. I have now been exposed to what a perfect muffin is capable of.

I hope you, dear reader, make this asap, so that you, too, can experience a perfect muffin. It doesn't get any better than this. Although my mom, who added mini chocolate chips to her batch, would say hers is better than mine. I suppose she's got a point.


Best Ever Banana-Walnut Muffins
Adapted from a recipe by Beth Hensperger in Williams-Sonoma Muffins
Makes 9-11 muffins

1 1/2 cups all-purpose flour
3/4 cup sugar
3/4 cup walnuts, coarsely chopped and toasted
1 1/2 teaspoons baking soda
1/4 teaspoon salt
1/2 cup walnut oil or canola oil
1 large egg
2 or 3 medium to large very ripe bananas, slightly mashed to yield 1 1/4 cups
3 tablespoons buttermilk (or 2 1/4 teaspoons buttermilk powder and 3 tablespoons water...I actually used extra buttermilk powder, about 3 tablespoons total, but followed the 3 tablespoons water)

Preheat the oven to 375 degrees F. Line a standard muffin pan with 10-12 paper liners or grease. The recipe yielded 11 muffins for me, only 9 when my mom made it. If you don't use all of the muffin cups in the pan, fill the empty ones with water to one-third full so you don't scorch or warp the pan.

In a medium sized bowl, stir together the flour, sugar, toasted walnuts, baking soda, and salt (and buttermilk powder if not using liquid buttermilk).

In a large bowl or stand mixer, whisk or beat together the oil, egg, mashed bananas, and buttermilk (or water if using buttermilk powder) until well combined. Add the dry ingredients and beat until evenly mixed, but don't overmix. Scrape the bottom of the bowl to make sure everything is incorporated.

Use a mini ladle to spoon the batter into each muffin cup, filling each one to the top of the cup. Don't worry, they crown perfectly and don't overflow onto the muffin pan.

Bake 20-23 minutes, until golden, set, and springy to the touch. Test for doneness with a cake tester or toothpick; it should come out clean. Remove the pan from the oven and allow to cool 5 minutes before transferring the muffins to a wire rack. Serve warm or at room temperature. They are great plain, with butter and/or jam, or cut in half and toasted with butter.


Step-by-Step in Pictures
Stir together the flour, sugar, baking soda, toasted walnuts, and salt; set aside...

In a large mixing bowl, beat together the egg, oil, buttermilk, and mashed banana...
Add the dry ingredients...
Beat until well incorporated...
Spoon evenly into muffin cups, filling all the way to the top...

Bake at 375 degrees F for 20-23 minutes until a toothpick comes out clean...
Remove from the oven and let cool 5 minutes in the pan, then transfer muffins to a rack. Enjoy!

Monday, July 12, 2010

Doughnut Muffins


Just the title alone, before I had read the list of ingredients or the preface to the recipe on King Arthur Flour, I knew I was going to have to make this. I love doughnuts. I love muffins. I love the idea of combining the two and I love the idea of baking, not frying the doughnut!

One of the most exciting things about this recipe is that all the ingredients are basic. You don't need anything fancy, and I'm referring to ingredients and appliances and tools. No deep-fryer needed!


So what is it about this recipe that makes the muffin taste like an old-fashioned cake doughnut? The nutmeg. That is the secret! And so I suggest you use more, not less. The recipe calls for 1 or 1 1/4 teaspoons nutmeg. I'd say go all the way and add the maximum recommendation.

These muffins really do taste like doughnuts. Next time, I want to play around with mix-ins, maybe adding some toasted walnuts or chopped chocolate to the batter. I also want to try replacing the cinnamon sugar topping with a glaze, just the way I remember cake doughnuts. But even the most plain version, simply following the recipe as is and not veering off to experiment, this recipe is a real winner.


Doughnut Muffins
Adapted from King Arthur Flour

Batter
1/4 cup butter, at room temperature
1/4 cup vegetable oil
1/2 cup granulated sugar
1/3 cup brown sugar
2 large eggs
1 1/2 teaspoons baking powder
1/4 teaspoon baking soda
1 to 1 1/4 teaspoons ground nutmeg, to taste
3/4 teaspoon salt
1 teaspoon vanilla extract
2 2/3 cups unbleached all-purpose flour
1 cup milk

Topping
3 tablespoons melted butter (I used unsalted)
3 tablespoons cinnamon sugar

1. Preheat the oven to 425°F. Lightly grease a standard muffin tin or use 12 paper liners...the cuter the better! :)

2. In a medium-sized mixing bowl, cream together the butter, vegetable oil, and sugars till smooth.

3. Beat in the eggs until well-combined.

4. Stir in the baking powder, baking soda, nutmeg, salt, and vanilla. If you want, taste the batter to see if you like the flavor because now's the time to add even more nutmeg, or introduce a whole new spice, like cinnamon!

5. Stir the flour into the butter mixture alternately with the milk, beginning and ending with the flour. I did this: 1/3 of the flour, 1/2 the milk, 1/3 of the flour, last 1/2 of the milk, last 1/3 of the flour.

6. Spoon the batter evenly into the prepared pan, filling the cups nearly full. Resist the temptation to use less batter in each muffin cup so you can make more than 12 muffins. The batter is the perfect amount for 12 muffins and they grow into beautiful crowns when baked!

7. Bake the muffins for 15 to 17 minutes, or until they're a pale golden brown and a cake tester inserted into the middle of one of the center muffins comes out clean. It took my muffins exactly 15 minutes so you might want to start checking after about 13 minutes.

8. Remove them from the oven, and let them cool for a couple of minutes, or until you can handle them. While they're cooling, melt the butter for the topping in the microwave.

9. Brush melted butter on the top of each muffin using a pastry brush, then roll the muffin in a shallow bowl of cinnamon sugar to completely cover the top. Don't skimp here; be liberal with the topping! Place the muffins on a cooling rack to allow the topping to set for a few minutes.

10. Serve warm, or cool completely on a rack so you can store airtight. If you know you can't finish all the muffins in a day or two, store the extras in the freezer in an airtight freezer container.

Yield: 12 muffins.


Step-by-Step in Pictures
Cream together the butter, oil, and sugars...

Add the eggs, then the baking powder, baking soda, nutmeg, salt, and vanilla...

Beat until well combined...

Add the flour and milk alternately, beginning and ending with the flour...

Adding the milk...

Your batter is ready!

Spoon the batter evenly into the 12 muffin cups...

Bake at 425 degrees F for about 15 minutes...

Let cool a few minutes, then loosen the muffin from the pan...

Brush the muffin with melted butter, then roll in a shallow bowl of cinnamon sugar...
Related Posts with Thumbnails