Showing posts with label pies and tarts. Show all posts

Monday, August 29, 2016

Zucchini and Onion (or Any-Vegetable-Combination-You-Want) Crescent Pie


Andrew and I have become suburban farmers. We planted some vegetables this summer hoping to turn our not-so-green thumbs around, and low and behold, we have zucchini and squash growing! We've already enjoyed a homegrown stir-fry dinner, so in an effort to find other creative ways to use up our bounty, I opted for this zucchini and onion crescent pie the other night. It had to be good; it won the Pillsbury Bake-Off in 1980!

Crust me, you're going to like this. ;)


What’s especially fun about this recipe is how interchangeable it is. Short on zucchini, but you have mushrooms and eggplant? Or broccoli? Or bok choy? Go ahead and swap the veggies out, still cooking them before adding them to the filling. It’s a very forgiving recipe; it can handle it.

The herbs called for give this pie an Italian flavor, but you can also have fun varying the seasonings, adding in cumin and chili powder, or rosemary, perhaps. It’ll all be delicious! I bet taco seasoning would be good. And onion soup mix, too! Maybe even ground beef or sausage. Each time you make this and adjust the ingredients, it will become an entirely new creation and never get boring.


Before I leave you to your cooking, I just have to comment on an interesting step in the recipe that I hadn’t seen before. It asks you to spread yellow mustard on top of the crust before you fill it. When I first read this, I thought, “How odd!” Although I never questioned it or hesitated for a second. The result when you take your first bite is enhanced flavor and in particular, a next-level savoriness. And apparently not all spell checks think savoriness is a word, but I assure you it is; it must be. It’s exactly what I need to describe the use of mustard.


So head to Trader Joe’s to purchase a tube of crescent rolls, or visit any major grocery store for Pillsbury’s version of the dough. You’re well on your way to pie for dinner.

And wish us luck in our suburban farming endeavors. We’re currently attacking our cucumber leaf mildew problem with a vengeance. We must emerge victorious. I want homegrown cucumbers!


Zucchini and Onion or Any-Vegetable-Combination-You-Want Crescent Pie
Adapted from a recipe by Millicent Nathan of Boca Raton, Florida, on the Pillsbury Bake-Off website

2 tablespoons butter or olive oil
4 cups zucchini, thinly sliced (or any other vegetable of your choice!)
1 large onion, chopped
2 tablespoons dried parsley flakes
1/2 teaspoon salt
1/2 teaspoon pepper
1/4 teaspoon garlic powder
1/4 teaspoon dried basil
1/4 teaspoon dried oregano
2 large eggs
2 cups (8 ounces) shredded mozzarella cheese (cheddar or muenster or jack or some combination would all work fine!)
1 can (8 ounces) refrigerated crescent dinner rolls (Pillsbury brand or Trader Joe's)
2 teaspoons yellow mustard

Preheat oven to 375 degrees F. In a large skillet, heat the butter or oil over medium-high heat. Stir in the zucchini and onions, and any other veggies you've selected. Cook 15 minutes until the veggies are tender and starting to brown. Stir in the parsley, salt, pepper, garlic powder, basil, and oregano. Remove from the heat and allow to cool briefly.

In a large bowl, add the eggs and beat well. Stir in the shredded cheese. Gently stir in the cooked vegetables, taking care not to break the vegetables. Set aside.

Now prepare your baking dish. Choose either a 9 or 10-inch glass pie plate, a 12x8-inch (2-quart) glass baking dish, or an 11-inch quiche pan. I recommend using a glass dish because it's easier to see when the crust is fully cooked. Open the tube of crescent rolls and separate the dough at the perforation marks into 8 triangles. Press these pieces into the baking dish so that the entire bottom and sides are covered. Seal the edges together so there are no holes for the filling to leak through. Using the back of a spoon, spread the yellow mustard all over the bottom and sides of the crust. Pour the egg-cheese-veggie mixture into the baking dish.

Bake, uncovered, for 18 minutes. Remove from the oven and cover loosely with foil to protect the crust, then return to the oven to continue baking for another 10-12 minutes. Insert a knife or cake tester into the center and if it comes out clean, the pie is done. Let stand 10 minutes before slicing.


Step-by-Step in Pictures
Saute the veggies and then add in the herbs. Set aside...

In a large bowl, whisk the eggs and then add in the cheese...


Add in the veggies, then set aside...


Press the dough into your pie dish, sealing all the seams...

Spread mustard over the bottom and sides of the crust...


Pour the filling over the crust and spread it around so it's evenly distributed...

Bake at 375 degrees F for 18 min uncovered, then cover and bake another 10 minutes...
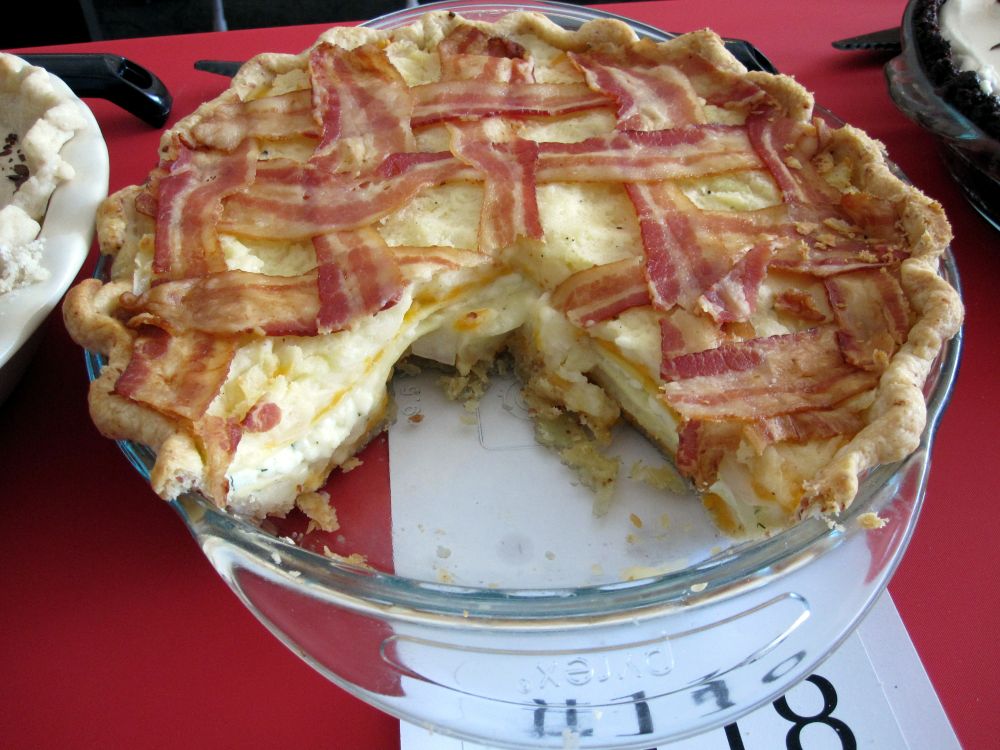
Enjoy!

Friday, January 23, 2015

Quick Puff Pastry Apple Hand Pies

I love apple pie. And I feel pretty confident (correct me if I'm wrong!) that it's a relatively "safe" dessert to serve at a dinner party or bring to a friend's. Most people don't cry, "Oh, the horror! Apple pie! Shield my eyes!" So it's a good go-to dessert. But sometimes I'm just not in the mood to make a big mess in the kitchen or I simply don't have time to start from scratch. Enter: Individual apple hand pies made with puff pastry!

I first learned about this recipe last spring when I was visiting my sister at her house; she had just given birth to my second niece and was now settling back in at home. It was evident that suddenly being catapulted into having two kids under 3 years old who needed constant supervision was going to require quick meals and creativity. My mom was in town staying over to help out and found this pie recipe online. It was so easy that she was able to assemble these pies and still get back to being the supportive mom and grandma requested of her. And the pies were a hit.
These pies are cute (because anything individual-sized is adorable...duh!), delicious, and EASY BREEZY. In fact, you could make them WITH your guests after dinner is over. Because group activities are fun! Just purchase a package of puff pastry that has two sheets in it, make the quick apple filling, and cut up the puff pastry into 9 portions. You sandwich the apple filling between two pieces of puff pastry and create a pie pocket. Add a little decorative fork-tining artwork to the edges, and you've got something that looks impressive but took no time or effort to make. I got ooohs and ahhhhs when I served this at a dinner party, and bonus points: the house smelled amazing! Serve the pies with vanilla bean ice cream for pie a la mode. Soooo good.

Quick Puff Pastry Apple Hand Pies
Adapted from a recipe on Food.com submitted by Chef Fifi

1 (17-ounce) package puff pastry that contains two pastry sheets (Trader Joe's sells this!!)
2 medium-sized baking apples (such as Granny Smith, Pippin, or Gravenstein), peeled, cored, and coarsely chopped
1/3 cup packed brown sugar
2 teaspoons flour
1 teaspoon lemon juice
1 teaspoon cinnamon
1/2 teaspoon nutmeg
1 egg, beaten

Thaw puff pastry according to directions on package.

To make the filling, in a medium bowl, combine apples with sugar, flour, lemon juice, cinnamon and nutmeg. Set aside.

Preheat oven to 350°F.

Place 1 sheet of puff pastry on a floured work surface and cut the pastry sheet into nine 3x3-inch squares. Will look like a tic-tac-toe board! Place the squares on an ungreased baking sheet. Scoop approximately 1/4 cup of the apple mixture onto the center of each square. Brush the edges with the beaten egg.

Place the second sheet of puff pastry on the floured work surface and cut the pastry sheet into nine 3x3-inch squares. Place one square on top of each apple filling-topped square on the baking sheet to form a pie pocket! Use your fingers to seal the edges together and then use a fork to go over the edges and create a design (criss-cross or straight or diagonal!).

With a sharp knife, cut a small L-shaped incision, about 1-inch, into the top of each pie and fold back the pastry flap so the pie can let steam escape while baking.

Brush each pie with the remaining egg wash.

Bake until golden brown on top, about 20 minutes. Sometimes I let it go a little longer because I want a darker, crisper crust.

Voila! Instant individual apple pies!

Monday, September 10, 2012

What to Do With Leftover Pie Crust Dough: Mini Zucchini Onion Quiches Baked in a Muffin Pan!


I made a strawberry pie earlier in the day, and had a bunch of scraps left from the dough I had rolled out for the top and bottom crusts. The scraps were sitting in plastic wrap in my fridge. Now, I hate to waste perfectly good dough (Ummm, did I say perfect? Why yes, yes I did! The dough is from David Lebovitz's Ready for Dessert cookbook and it's my new favorite, probably never-to-be-one-upped pie crust recipe).


So anyways, I threw a couple of ingredients together, totally makeshift, a whatever-I-had-in-the-fridge kind of thing, and it turned into an amazing mini quiche recipe that made use of every last ounce of that dough!


So here's the thing. This is not an exact science. Everyone is going to have a different amount of leftover pie dough when they finish making their pie. So, go ahead and make this quiche filling, and if you end up having too much for the amount of pie dough you have left, simply divide up the rest of the filling into buttered ramekins and bake crustless quiches! There's simply no way to fail, guys! The math will work out! You'll net zero extra, wasted crust. You'll gain deliciousness, and maybe a few pounds.


Whatever you do, DO NOT THROW OUT YOUR PIE DOUGH SCRAPS! A much better destiny awaits them!


Mini Zucchini Onion Quiches in Leftover Pie Crust (Though Crustless Quiches Work Great, Too!)
Recipe by Happy Go Marni

3 eggs
1 cup buttermilk (feel free to use powdered buttermilk with water instead, or even regular milk)
1 teaspoon kosher salt
1 teaspoon garlic salt
1 tablespoon dried oregano
1/2 cup parmesan cheese, shredded
1 zucchini, grated or shredded
1 onion, chopped

However much leftover pie crust dough scraps you have from the delicious pie you were making for dessert

Preheat the oven to 350 degrees F. Have an ungreased muffin pan ready.

Divide the leftover pie dough into balls about 1 inch in diameter. On a floured work surface, roll each ball of dough into a circle about 5 inches in diameter, or large enough to cover the bottom and sides of a muffin cup. Gently press the dough into the muffin cup, stretching or patching the dough so that it reaches all the way to the top of the cup. Using the tines of a fork, poke several holes in the dough on the bottom and all over the sides. If you don't have enough pie dough to fill all 12 muffin cups in the muffin pan, fill the empty cups with a half-inch of water. Bake in the oven for about 15 minutes, until golden. If the crust starts to puff up too much in the first 5 minutes, open the oven door and use a fork to puncture the air pockets.

While the mini crusts are in the oven, prepare the quiche filling. In a large bowl, whisk the eggs together. Add the buttermilk and stir to combine. Then add in the salt, garlic salt, oregano, and parmesan cheese. Stir in the zucchini and onion.

When the crusts come out of the oven, use a ladle to pour the filling into the crust cups to about 3/4 full. If you have extra filling, butter some ramekins and fill them 3/4 full with quiche filling. Place the ramekins on a lined baking sheet. Return the muffin pan and the ramekins to the oven and bake for 20-35 minutes. I found that I preferred cooking them on the longer side so the tops would be golden, but technically, the eggs are done cooking and ready to eat much sooner.

NOTE: The night I did this, I had enough leftover pie dough to line 12 muffin cups (1 entire muffin pan) with crust. The quiche filling recipe I concocted allowed me to fill all 12 of the crust-lined muffin cups and an additional 4 ramekins of crustless quiches.

ENJOY! Don't eat them all at once!

Saturday, June 2, 2012

Chocolate Pecan Pie with the Flakiest Crust Everrrrrr!


This is such an amazing chocolate pecan pie, and I shouldn't be surprised...it's from Alice Medrich! Don't just make it at Thanksgiving time. Pecans are always readily available, and deliciousness should be fair game anytime of year. It's not a difficult recipe, either. The filling is pretty basic, and no challenging cooking technique required. The crust only has a few ingredients and you don't need a food processor. If you want to go all out, choose extra special chocolate. The chocolate shines through in this pie, so splurging on better quality chocolate is actually worth considering here.


Make it for a dinner party, a holiday get together, or for a weekend all by yourself. Just be sure to sign up for an intense cardio class at the gym if you opt for option 3.

I'm thinking there will be more pies in my future. This was really fun to make, impressive, and absolutely beyond delicious. The flaky crust did my guests and me in! I haven't recovered from that yet.


Chocolate Pecan Pie
Adapted from a recipe by Alice Medrich in Chocolate Holidays
Serves 8-10

Crust
1 1/2 cups all-purpose flour
3/4 teaspoon salt
10 tablespoons (1 1/4 sticks) unsalted butter, cut into chunks
4-5 tablespoons water

Filling
2 ounces bittersweet or semisweet chocolate, coarsely chopped
1/4 cup light corn syrup
1 tablespoon melted butter
1 cup (lightly packed) dark brown sugar
1/4 teaspoon salt
1 tablespoon rum, bourbon, or brandy
1 teaspoon vanilla extract
3 eggs
2 cups pecan halves, toasted
Vanilla bean ice cream or lightly sweetened whipped cream

For the crust, in a mixing bowl combine the flour and salt. Cut the butter chunks into the flour mixture using a pastry blender or two knives. Continue until the largest pieces are the size of peas and the rest are the size of bread crumbs. Be careful not to overmix or the butter will turn into a paste or even melt. Drizzle 4 tablespoons of water over the mixture and distribute this moisture into the dough with a rubber spatula, folding and pressing as you go, until the mixture is just wet enough to hold together. Add up to 1 tablespoon more water if necessary. Press the dough into a flat disk and wrap in plastic wrap before chilling in the fridge for 30 minutes and up to 3 days before using.

When you're ready to bake the crust, remove the dough from the fridge and let stand until you can roll it out on a lightly floured work surface and it won't crack. Roll the dough into a circle about 1/8-inch thick, rotating the dough as you go. Fold the dough into quarters and transfer to the pie pan. Unfold the quarters and carefully press into the pan so that the dough reaches 1 inch beyond the rim of the pan. With the dough that's hanging over, tuck it under and flute or crimp the edge. Chill the crust in the fridge at least 30 minutes before baking.

Position a rack in the lower third of the oven. Preheat the oven to 400 degrees F.

Remove the chilled pie crust from the fridge. Press foil (shiny side down) over the crust, taking care not to wreck the crimped edges. Use a fork to prick the bottom of the crust all over, piercing right through the foil. Use pie weights or dried beans to weigh down the crust. Bake for 20 minutes. Remove the foil liner and pie weights and return to the oven to bake for another 10 to 12 minutes or until the crust is golden brown.

For the filling, which you should prepare while the crust is baking, combine the chocolate with the corn syrup and butter in the top of a double boiler set over a pan of barely simmering water. Or you can skip the double boiler and cook directly over the stove, but you have to be much more careful about not burning the chocolate. Stir the chocolate until it is completely melted and smooth, then stir in the brown sugar, salt, rum, and vanilla. Add the eggs and continue stirring until well combined and hot to the touch. Remove the pan from the heat and stir occasionally until ready to use.

When the crust is done, remove it from the oven, but leave the oven on. Scatter the toasted pecans over the bottom of the crust. Pour the hot filling over the pecans and return the pie pan to the oven. Bake for 10 to 12 minutes, until the filling is puffed and cracked at the edges, golden brown in spots, but still jiggles in the center if poked or shaken slightly. Unfortunately you can't use the toothpick rule here because if you insert a toothpick, it's not supposed to come out clean. There will be gooey deliciousness stuck to it. As the filling is baking, if you notice that the crust is browning too fast, cover the edges with foil. Cool the pie on a wire rack. Serve warm or at room temperature with vanilla bean ice cream or lightly sweetened whipped cream. Enjoy!

Wednesday, September 8, 2010

Two Consecutive Wins Would Have Been Nice but the 2nd Annual KCRW Good Food Pie Contest Brought Back the Mother-Daughter Team So It's All Good


This Sunday was the 2nd Annual KCRW Good Food Pie Contest. Last year, my mom and I entered together, as the only mother-daughter team, and took home 1st place in the Cream Pies category. It was quite a thrill and totally unexpected. This year, we didn't fare as well, at least not ribbon-wise. But here I am, standing before you with my head held high, chin up, to report that we are A-Okay. We survived our two-consecutive-wins-missed-opportunity and are here to talk about it!

Our pie entry

My mom, who lives in Northern California, flew down for the weekend, just like last year, so that we could enter together. What more could a daughter ask for? Seriously! People! As corny as it sounds, that makes me a winner right off the bat. We spent a few weeks going from pie concept to testing crusts to testing full-on pies right up until the weekend of the event. And as we were making the official entry pie together, we also decided to make an additional one since we knew we'd have to give away the entire official pie. Good thing we decided to do that. Friends and coworkers really appreciated getting to taste the pie!

Serving our pie to the public

Our pie was no easy project. What's funny is, Evan Kleiman, the wonderful restaurant owner, host of Good Food on KCRW, and master of ceremonies at the pie contest, even noted on her blog that complex, over-the-top pies are not necessary for you to win a ribbon. And then she reminded readers of last year's Best in Show, a classic apple pie. But here's the thing, Evan, and anyone who read that tip. That is asking me to be a different person. :-P

My mom crimps the edge of the pie crust

My mom holds the pie carefully as we drive to the drop off location

The fun for my mom and me was inventing a pie that captured, in one product, a variety of our favorite flavors, carried out with great texture, visual interest, and overall intrigue. And with that intro, allow me to present our pie: The Orange-Maple-Hazelnut Pie with Thick Chocolate Glaze and a Garnish of Candied Orange Peel and Caramelized Hazelnuts.

Handing the pie over to the authorities

Basically, and it's far from basic (hehe), we started with a flaky pie crust, brushed a sweetened orange marmalade on the bottom, then sprinkled our homemade candied orange peel on top of that, then poured in the orange-maple-hazelnut filling, topped it all off with a thick semi-sweet chocolate glaze, and decorated with caramelized hazelnuts and more candied orange peel.

Did we overdo it? Nah. Not if you ask our taste buds.

But that's not to say we were anticipating or prepared for such a labor-intensive project! I think we were in shock over what we had gotten ourselves into. I have to admit, we created something complicated enough that, at times, we were looking at each other going, "Wait a minute, why are we caramelizing hazelnuts? I've been stirring this saute pan of nuts, water, and sugar for ten minutes and my arm is going to break off! Owww!" Actually, it was a funny sight to behold. I finally finished the nuts, it must have been well after midnight, and then I literally collapsed on the floor. Maybe I was being a drama queen, but man, my biceps were bulging, pulsing with their own heartbeat, because of the effort I exerted stirring those nuts! Don't believe me? You try caramelizing a pie's worth of hazelnuts in the middle of the night, then give me a call.

Caramelized hazelnuts

Oh, and just the step of getting the shells off the nuts was time-consuming. And let's talk about the candied orange peel. Peeling the oranges and scraping the bitter white insides off the peel, then slicing into fine pieces was tedious. These are just a few of the steps people don't realize might go into making a pie. I'm here to tell you they occurred. And we did them with a smile on our face, and an occasional over-dramatization to get us through the night. But it was a girl's night, a gigglefest the whole way through; Mom and daughter were having a blast baking in the kitchen together.

Homemade candied orange peel!

There was an apron fashion show at the pie contest so my mom brought an apron down from the Bay Area that my sister Beth gave her, and I wore one that my friend Crystal sewed for me. It was neat to see all the different apron designs. Several of the participants came wearing their special apron and Evan Kleiman interviewed each of us on stage about our selection. That was a very fun, fresh new touch to the contest over last year.

Evan Kleiman interviewing my mom during the apron fashion show

The 2nd Annual KCRW Good Food Pie Contest was very different from last year, not just because of the apron fashion show. If I could give a little bit of constructive feedback about the contest for future years (and I hope there will be many, many more of these to come!), the following would be my tips. I say these not to take away from the event - because the bottom line is, as you can see from the grins on our faces, we had a lot of fun - but so that the 3rd annual contest can outdo the 2nd!:
  • Judging. Last year, the judging happened right in front of the public at a mall in the valley. This year, the event was hosted at the Taste of Beverly Hills food event and was free and open to the public. But the judging did not occur in front of us, and I very much miss that from last year. It was behind closed doors before they opened the gates to the public. Perhaps the single most exciting thing about the contest for me is watching a celebrity chef or famous food figure take a fork and dig into my pie, my amateur, made-at-home pie. For one, brief moment, I'd feel connected to an otherwise "unreachable" person via my pie. Most people aren't going to win the contest, so the best gift you can give them is the knowledge, satisfaction, and perhaps the photo they'll take, of a famous judge eating their pie. My photos from last year showing Chef Eric Greenspan, Chef Mark Peel, and LA Times Food Editor Russ Parsons enjoying my pie are like gold to me! But by removing that element this year, there was no "parting gift" for the many entrants who worked so hard to be there.
  • Slicing. Each entrant's pie had its place at one of the long tables, numbered and labeled, and with a large slice missing from it, clearly the one that went to the judges. I got to my pie at its table placement and saw damage to my pie from where the one judges' slice was missing. I wished then, that I could have been the one to slice and plate my pie for the judges (which I was allowed to do last year), since I knew the layers inside, the texture, and so I would know best what knife to use and how much pressure and so forth. Until the moment the forkful of pie goes into the mouth of a judge, it seems most fair that the entrants have complete control over their pie's presentation and integrity.
  • Schedule. Finally, the format for the afternoon was a bit anti-climactic. In the early part of the event, the semi-finalists were announced and all of the non-winners were sent to their pie station to prepare to serve their pies to the public. So very early in the event, you found out you didn't win, and then all that was left for you to do before you go home was share your pie. But that meant I missed some of the judging of the finalists and the excitement happening on stage.
Feedback notwithstanding, I had a wonderful afternoon at the 2nd Annual KCRW Good Food Pie Contest. I ran into a ton of my food blogger friends. The KCRW staff was so sweet and cheerful. My mom flew in and baked with me. Family came to cheer us on. I exchanged business cards with a couple of people. And everyone who tasted our pie really enjoyed it. In fact, they'd come over and say,"We heard down there that we needed to come here to taste your pie!" So we felt very flattered.

A special shout out to Harriet, Sarah, Evan, and the rest of the crew at KCRW for organizing an event chock full of personality. That is no easy task! And by the looks of it, people were having a ball and rubbing their bellies.


Some of the Blog Coverage
ShopEatSleep: So much pie: KCRW's Good Food pie contest
LAist: Pie, Pie, Pie! KCRW's Annual Contest Served Up Fun by the Slice
Good Food Blog: Good Food Pie Contest Photos
Good Food Blog: Good Food Pie Contest Winner!
Diana Takes a Bite: Eating Pie and Making STRIDES
The Duo Dishes: KCRW's 2nd Annual Good Food Pie Contest
Caroline on Crack: Photo Gallery: KCRW's 2nd Annual Good Food Pie Contest


Pie-Packed Photo Album!


Related Posts with Thumbnails