Showing posts with label cookies. Show all posts

Monday, May 27, 2013

Ultimate Chocolate Chip Cookies with Fleur de Sel on Top


I was sifting through Leite's Culinaria (one of my favorite recipe websites of all time; definitely go there after you're done reading my entire post ;) ) when I happened upon a chocolate chip cookie recipe that claimed to be the ultimate version. I was intrigued by the recipe because first of all, it was making quite the claim, and secondly, it had just enough interesting changes from a more traditional chocolate chip cookie recipe that the claim actually seemed possible. Notice the cake flour and bread flour called for in the recipe. Neither of those ingredients is standard in a basic chocolate chip cookie. Maybe those are the two top secret ingredients that put a chocolate cookie over the edge into Cookie Stardom. I had to know for sure!


So I whipped up a batch of dough, tossed the bowl of dough in the fridge, and waited anxiously for a miserable 24 hours to bake it the following night. If you're wondering why I had to wait a night, it's because the recipe said to wait (it's not because I'm into self-inflicting pain), and I wanted to follow this recipe to a T so I could give it a proper assessment of its worthiness to be called "Ultimate." Fast forward to the next night, and I scooped mounds of dough onto my baking sheet, sprinkled fleur de sel on top of each mound, and baked them for no more than 10 minutes.


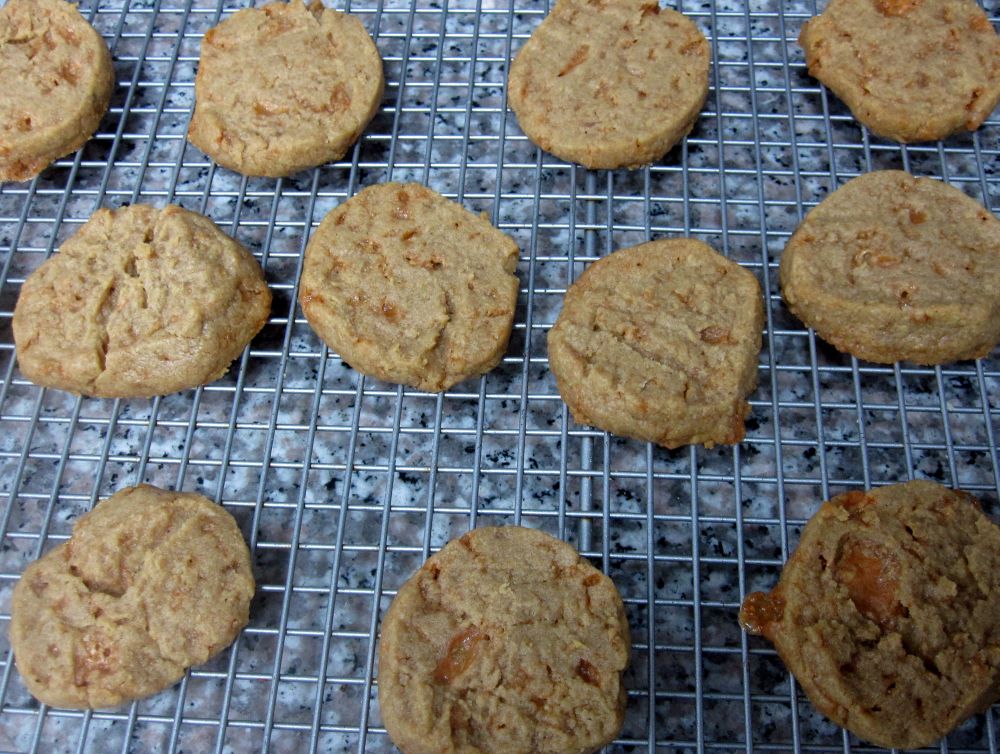
It might sound ridiculous, but even just looking at them when they came out of the oven, I could tell these were a special breed of chocolate chip cookie. They had exactly the right coloring, the right thickness, and a heavenly aroma. Of course the first bite was what truly did me in and sealed the deal.

These cookies deserve the "Ultimate" title. A cookie doesn't get any more perfect than this.


Ultimate Chocolate Chip Cookies with Fleur de Sel on Top
Adapted from a recipe in Leite's Culinaria, originally from Jacques Torres
Makes about 4 dozen small cookies

2 cups minus 2 tablespoons (8 1/2 ounces) cake flour
1 2/3 cups (8 1/2 ounces) bread flour
1 1/4 teaspoons baking soda
1 1/2 teaspoons baking powder
1 1/2 teaspoons kosher salt
1 1/4 cups (2 1/2 sticks) unsalted butter, at room temperature
1 1/4 cups (10 ounces) light brown sugar
1 cup plus 2 tablespoons (8 ounces) granulated sugar
2 large eggs
2 teaspoons vanilla extract
1 1/4 pounds bittersweet chocolate, chopped (can use disks, bars, or chips), at least 60 percent cacao content
Fleur de sel or other sea salt for sprinkling on top

Sift together the flours, baking soda, baking powder, and kosher salt in a bowl and set aside.

In the bowl of a stand mixer, cream the butter, brown sugar, and white sugar until light and smooth, about 5 minutes. Add the eggs, one at a time, mixing well after each addition. Beat in the vanilla. On low speed, beat in the dry ingredients just until combined. This should only take about 10 seconds; do not overmix or you'll have tough cookies. Add in the chopped chocolate and mix to incorporate. Cover the dough with plastic wrap by pressing the wrap directly over the surface of the dough in the bowl and chill in the fridge for 24 to 36 hours. Feel free to use only a portion of the dough at a time for up to 72 hours. That way you can keep making fresh small batches of cookies as you desire them!

To bake the cookies, first preheat the oven to 350 degrees F. Line a baking sheet with a nonstick baking mat or parchment paper.

Scoop heaping teaspoon-sized balls of dough onto the baking sheet, leaving at least an inch between cookies. Flatten any chocolate pieces that are sticking straight up so that they are lying horizontally. Then sprinkle the top of each mound of dough with fleur de sel. Bake for 8-10 minutes, until a very light golden brown, but pale enough that they look a little underdone. That will ensure they are chewy! Remove from the oven and place the cookie sheet on a wire rack to cool for 10 minutes, then transfer the cookies from the sheet directly to a wire rack.

Enjoy this perfect cookie with a tall glass of milk!


Step-by-Step in Pictures
Cream together the butter and sugars...

Add the eggs, one at a time...

Beat in the vanilla...

On low speed, beat in the dry ingredients...

Mix in the chopped chocolate, then chill the dough in the fridge for at least 24 hours...

Scoop mounds of dough onto the baking sheet...

Sprinkle each mound of dough with fleur de sel...

Bake at 350 degrees F for 8-10 minutes...

Take a bite!

Monday, November 12, 2012

Move Over, Peanut Butter! I'm Nutty for Almond Butter Chocolate Chunk Cookies!


Peanut butter will always have a special place in my heart. It's one of my favorite ingredients of all time, and the flavor combination of peanut butter and chocolate is arguably (am I arguing with myself?) my all time favorite. But man, oh man, I have to tell you, I feel a little disloyal to peanut butter as I share this recipe with you. Because here's a cookie that features not peanut butter, but ALMOND butter, and it's as good as or better than any peanut butter cookie recipe I've ever had EVER. Whew! That hurt to say.


I remember vividly the day I made this cookie. My brother was moving to LA for school so my mom was in town helping out with the move. While they were out and about running errands, dealing with the housing office, and other assorted not-so-fun tasks, I was in the kitchen making, unbeknownst to me, what would become one of my favorite cookies of all time. As I took the last tray of cookies out of the oven to cool, my mom and brother called to say they had accidentally left some important housing paperwork at my apartment and were going to head over to pick it up. They were in a huge rush and would need me to run down to the street to hand them the paperwork.


So naturally, I grabbed a Tupperware container and plopped a bunch of cookies in it for them. My mom and brother were going to need some almond butter chocolate chunk cookies for the road, I figured. Moving Day will be so much better with cookies!

A few minutes later, I got a call on my cell phone and it was them, pulling up to the front of my building and needing me to run down with the paperwork. I put my flip flops on, grabbed the paperwork and the container of cookies, and ran downstairs. I presented them with the care package and they seemed excited and thanked me. Then they drove off.

I ran back upstairs, and just a few minutes later, I got another call on my cell phone. It was them again. "Something wrong?" I asked. Well yes, something was the matter. They were calling to let me know that they'd run out of cookies. They had eaten the entire container within a mile or two of my apartment.

And THAT, my friends, is how you know you've made a good cookie. That, or my mom and brother have zero willpower. :)

Move over peanut butter, there's a new nut butter in town. I'm nutty for almond butter cookies!


Almond Butter Chocolate Chunk Cookies
Adapted from a recipe by Emily Luchetti in Fearless Baker
Makes at least 4 dozen cookies

1/2 cup sliced almonds
8 tablespoons (1 stick) unsalted butter, softened
1 cup granulated sugar
1 large egg
1 cup almond butter
1 1/2 cups unbleached all-purpose flour
1 teaspoon baking soda
1/2 teaspoon kosher salt
3 ounces dark chocolate (58 to 62 percent cacao suggested, but any semisweet or dark will work fine), chopped or broken into tiny pieces

Preheat the oven to 350 degrees F. Place one rack in the upper third of the oven and another rack in the lower third. Line 2 baking sheets with silicone baking mats or parchment paper.

Toast the almonds in one layer on a foil-lined baking sheet until light golden brown, about 8 minutes. I used a toaster oven, but you can use the oven, too. Do not go too far away from the kitchen because nuts burn easily! Let the almonds cool, then chop them into smaller pieces. Set aside.

In the bowl of a stand mixer, beat the butter and sugar until smooth. Add the egg and beat until combined, scraping down the sides of the bowl as needed. Blend in the almond butter, then add the flour, baking soda, and salt. Mix until well incorporated and smooth. Remove from the mixer and stir in the chopped chocolate and almonds with a wooden spoon.

Scoop tablespoon-fuls of dough onto the prepared baking sheets, spacing them 1 inch apart. Feel free to make the mounds of dough larger or smaller (just adjust the baking time accordingly). With the bottom of a glass, flatten each mound of dough slightly. Bake for 8-10 minutes, or until the edges are lightly browned but the center still feels soft. Do not overbake them; err on the side of underbaking since they'll continue cooking a bit as they cool. Halfway through baking, swap the two tray locations so they bake evenly. Once done, remove from the oven and allow to cool on the pans on a wire rack for 10 minutes, then transfer the cookies to a wire rack to cool completely. 


Step-by-Step in Pictures
Beat the butter and sugar together...

Beat in the egg...

Beat in the almond butter...

Beat in the flour, baking soda, and salt...

Stir in the chopped chocolate and almonds...

Scoop tablespoonfuls of dough onto a prepared baking sheet...

Use the bottom of a glass to flatten the top of each mound of dough...

Bake at 350 degrees F for 8-10 minutes...

Saturday, September 8, 2012

Casting in LA: How Would You Keep Mrs. Fields' Cookies From Crumbling?

A casting director contacted me about a new show for Oprah Winfrey's network OWN and TLC. The show's topic? How to revive Mrs. Fields in this difficult economy. The show is looking for customers of the cookie company in the Los Angeles area who have ideas and opinions on what Mrs. Fields should do to increase sales and get the company going strong again. If they choose you for the show, there's monetary compensation. There's even the chance that you could be hired to work for Mrs. Fields. Plus, come on, you can't argue with that good feeling you get from saving cookies from destruction. Be the hero and apply for this show!

Here's how to apply:
Email customercasting@gmail.com and include the following info:
  • Name
  • Age
  • Occupation
  • Current contact info
  • Which brand you'd like to help out (Mrs. Fields)
  • What changes you would make if you were the boss

More details, direct from the casting guy:
This episode focuses on Mrs. Fields Cookies, which has been struggling in the current economy. They’re looking to reach out to the Los Angeles area and its neighboring communities for help. In each episode loyal customers will be given the chance of a lifetime to help a brand that they love re-establish itself. The show is extremely positive and allows the average everyday customer a chance to work with and help reconfigure one of their favorite companies in addition to aiding the current economy by saving some jobs in the area.

We are currently looking for outgoing, opinionated and creative consumers who might be interested in being a part of the show. Participants must be 18 years of age and over. We are open to customers from all walks of life as long as they are passionate about the company and creative enough to come up with ways to improve the brand.

And more from Happy Go Marni:
Good luck cookie-saving!

Sunday, February 5, 2012

Pumpkin, Cinnamon, and Chocolate Chip Cookies


It's February and I still have leftover cans of pumpkin. What a great reason to make pumpkin cookies. Not to mention, I have a bag of cinnamon chips that I picked up at the King Arthur Flour headquarters in Vermont last fall and they deserve to be featured in something where they can truly shine. These cookies allow them to shine.

The crunch from two kinds of chips combined with canned pumpkin and pumpkin pie spice result in a fantastic cookie. As is common with pumpkin cookies, these are more on the cakey side than the chewy side. But I love them. I had a friend over the night I made these and let's just say, it's a good thing he has such a fast metabolism (we can all despise him). He must have inhaled 10 cookies without much of a breath between bites. I'm already thinking I should make another batch of these. I still have more canned pumpkin to go through, and there are more friends to feed!


Pumpkin, Cinnamon, and Chocolate Chip Cookies
Adapted from a recipe on the Keep It Sweet blog
Makes about 5 dozen cookies

1 cup (2 sticks) unsalted butter, softened
1 cup granulated sugar
3/4 cup packed light brown sugar
2 eggs
1 tablespoon vanilla extract
1 cup canned pumpkin (do not use pumpkin pie filling - it's not the same thing!)
3 1/4 cups all-purpose flour
1 teaspoon salt
1 teaspoon baking soda
1 teaspoon pumpkin pie spice
2 cups semi-sweet chocolate chips
1 cup cinnamon chips (King Arthur Flour sells amazing cinnamon chips, just FYI!)

Pre-heat oven to 350 degrees F. Line 2 baking sheets with parchment paper.

In a medium bowl, whisk the dry ingredients together: flour, salt, baking soda, and pumpkin pie spice. Set aside.

In the bowl of a stand mixer or using an electric hand mixer, beat the butter and sugars together until fluffy and light in color.

Add the eggs and vanilla and beat until incorporated, 1-2 minutes. Then beat in the pumpkin.

Gently stir in the dry ingredients and do not overmix.

Stir in the chocolate chips and cinnamon chips.

Scoop tablespoonfuls of cookie dough onto the prepared baking sheets, spacing each mound 1 inch apart because they will spread. Bake 8-10 minutes. The cookies will look set when done, and you can test this by lightly pressing your finger against the top and if it doesn't leave an indentation, it is ready. Cool on baking sheet for 10 minutes, then transfer to a wire rack to cool completely.


Step-by-Step in Pictures
Beat the butter and sugars together...

Add the eggs...

Add the vanilla...

Add the pumpkin...

Stir in the dry ingredients...

Stir in the chocolate chips and cinnamon chips...

Scoop out tablespoonfuls of cookie dough onto the prepared baking sheet...

Bake at 350 degrees F for 8-10 minutes. Allow to cool, then enjoy!

Thursday, January 12, 2012

Unicorn Poop Cookies, the Most Magical Cookies in All the Land


I simply cannot take credit for such an amazing cookie. The Unicorn Poop Cookie is the brainchild of a genius named kristylynn84 (at least, that's her username on Instructables). Try it at home! She provides the recipe and step-by-step instructions here. And she even made a cheesy-good video set to classical music that beholds such a beauty.


I always knew baking was magical, but this takes it to a whole new level.

Friday, September 30, 2011

Peanut Butter Butterfinger Cookies


Believe it or not, I am still using up the chopped candy pieces I acquired from the birthday party my friend hosted for her husband back in April. She had an ice cream-themed party with a gazillion toppings so you could build your own amazing sundae. At the end of the party, she sent me home with lots of the leftover toppings, not knowing what to do with them. I've been having a blast baking with them or snacking on them plain. Already used up the Oreos, Kit Kats, M&Ms, and mini peanut butter cups.


This time around, I took her crushed Butterfingers and decided to add them to a peanut butter cookie. And not just any peanut butter cookie. David Lebovitz's. I added some vanilla to his recipe, tossed the crushed Butterfingers in at the last minute, and shaped the dough into cookie logs so I could slice and bake. Oh man, these cookies are amazing. They are chewy and peanut buttery, and then they have these baked Butterfinger bits in them that add some caramelized crunch. I could not be happier with the result!


Peanut Butter Butterfinger Cookies
Adapted from a recipe by David Lebovitz in Ready for Dessert
Makes 30 cookies

1 1/4 cups all-purpose flour
1 tablespoon baking powder
1/4 teaspoon salt
1/2 cup (1 stick) unsalted butter, melted
1/2 cup granulated sugar
1/2 cup packed light brown sugar
1 cup creamy peanut butter (not natural; I used Skippy)
1 teaspoon vanilla extract
1 large egg, at room temperature
1 cup chopped Butterfingers (this is a rough estimate; feel free to use more or less!)

In a small bowl, whisk together the dry ingredients (flour, baking powder, and salt). Set aside.

In a stand mixer or large bowl with hand mixer, beat the butter, both sugars, and peanut butter together on medium speed until smooth. Blend in the vanilla and egg. Add the dry ingredients and mix just until incorporated. Stir in the chopped Butterfingers.

Leave in the bowl, covered, or shape the dough into a couple of logs wrapped in plastic wrap. Then chill in the fridge for at least 2 hours or overnight. You can also freeze the cookie dough logs in Ziploc bags to make cookies at a later date.

When you're ready to bake, preheat the oven to 350 degrees F. Line 2 baking sheets with silicone baking mats or parchment paper. Drop balls of dough onto the baking sheet or slicing the logs into approximately 1/2-inch thick discs and space evenly apart. Use a fork to flatten the tops of the cookies. Bake for 8 to 10 minutes, rotating the sheets front to back and top shelf to bottom shelf halfway through baking. The cookies will look slightly underdone, but start to look golden around the edges. Underdone is the key to chewy cookies!!

Cool the cookies on the baking sheets for 10 minutes, then transfer to cooling racks.


Step-by-Step in Pictures
Whisk together the dry ingredients and set aside...

In a large bowl, beat together the butter, sugars, and peanut butter...

Blend in the egg and vanilla...

Stir in the dry ingredients...

Stir in the Butterfinger bits...

Mix just until incorporated...

Shape into cookie dough logs and wrap in plastic wrap. Chill in the fridge for at least 2 hours, or freeze in a Ziploc bag...

If you're going to freeze to bake at a later time, be sure to include some instructions on the Ziploc bag so you'll know how to finish off the baking!

When you're ready to bake, slice the log into discs...

Place the discs evenly apart on a baking sheet, then press down with a fork to create a crosshatch design...

Bake at 350 degrees F for 8-10 minutes. Err on the side of underbaking them...

Yummo!!
Related Posts with Thumbnails