Showing posts with label ice cream. Show all posts

Thursday, September 17, 2015

Apples and Honey Ice Cream for a Sweet New Year


Shana tovah! Happy New Year!

I always look forward to this time of year because it centers around family and food. Mmmm. Two of my favorite things in the world! And it just feels like a really special time. All the fine china comes out, the pretty tablecloth, the fancy candlestick holders, and the house looks extra tidy. The aroma of incredible baked goods or sweet apricot chicken and praline pecan-topped kugel waft through the rooms.


About a week before the holiday, in true "Mom fashion," my mom sent me an extremely ambitious detailed menu for the three Rosh Hashanah meals: Erev Rosh Hashanah dinner, Day 1 dinner, and Day 2 dinner. Whew! That's a lot of cooking! Her menu must have been three pages long! In addition to multiple entrees, kugels, soup, vegetables, salad, chopped liver, and challah (everything from scratch!), she had a variety of desserts included in the list, such as rugelach, apple pie, and honey cake. I offered to help her prepare a bunch of the recipes in her menu. But in true "Marni fashion," I added to the list. Somehow, I find there's always room for more dessert...

I wanted to make ice cream for Rosh Hashanah, so I started to think about appropriate flavors for the holiday. Really, anything sweet would probably suffice, since this is a holiday all about sweetness. But could I be more spot-on with my flavor choice? Yes. Apples and honey! The question then became, how the heck do you infuse those two flavors into an ice cream base? I decided to make a honey ice cream by swapping out the typical granulated sugar called for in ice cream and replacing it with half a cup of honey, and then I caramelized some apples to stir in during the churning process. It worked out great! This ice cream is everything I hoped it would be! The essence of Rosh Hashanah captured in ice cream!


"Apples and Honey" Ice Cream
A.K.A. Honey Ice Cream with Caramelized Cinnamon Sugar Apples

Honey Ice Cream
Adapted from a recipe in The Perfect Scoop by David Lebovitz

1 cup whole milk
A pinch of salt
1/2 cup honey
2 cups heavy cream
5 large egg yolks

Pour the heavy cream into a large bowl and place a strainer over the bowl. Set aside.

In a saucepan, warm the milk, salt, and honey.

In a medium bowl, whisk the egg yolks. Pour some of the warmed milk into the egg yolks, whisking constantly so you don't cook the eggs and accidentally turn them into omelet! Continue adding the rest of the warmed milk into the egg yolks until all of it is combined and you've warmed the egg yolks, then pour all of this egg-milk mixture back into the saucepan.

Cook the egg-milk mixture over low heat, stirring with a spatula constantly until the mixture thickens into a custard and coats the spatula. You can tell it is done if you swipe your finger down the back of the coated spatula and it leaves the mark of your finger.

Pour the custard through the strainer into the heavy cream, then stir to combine. Cover and chill the mixture in the fridge for at least 6 hours or overnight.

Once chilled, churn the mixture in your ice cream maker. When the ice cream is almost fully churned, add the caramelized apples (see recipe below) by dropping them down the opening of the ice cream maker and allow to churn for 1-2 more minutes to incorporate. Transfer the ice cream to freezer containers and freeze until set. Enjoy!


Caramelized Cinnamon Sugar Apples
Recipe by Happy Go Marni

3 baking apples such as Gravenstein or Granny Smith
Juice of half a lemon
1/4 cup sugar
2 teaspoons cinnamon
2 tablespoons unsalted butter

Squeeze the lemon juice into a medium bowl. Peel and thinly slice the apples and chop into 1-inch long pieces. As you are chopping, place the pieces into the bowl and turn to coat the apples with the juice so they don't brown. Stir in the sugar and cinnamon until well combined.

In a skillet, melt the butter and add the apples. Cook on medium heat until the apples are softened and caramelized, about 15 minutes. Be sure to stir occasionally so the apples don't burn. Allow to cool completely before stirring into the ice cream maker.


Behind the Scenes Photo Gallery
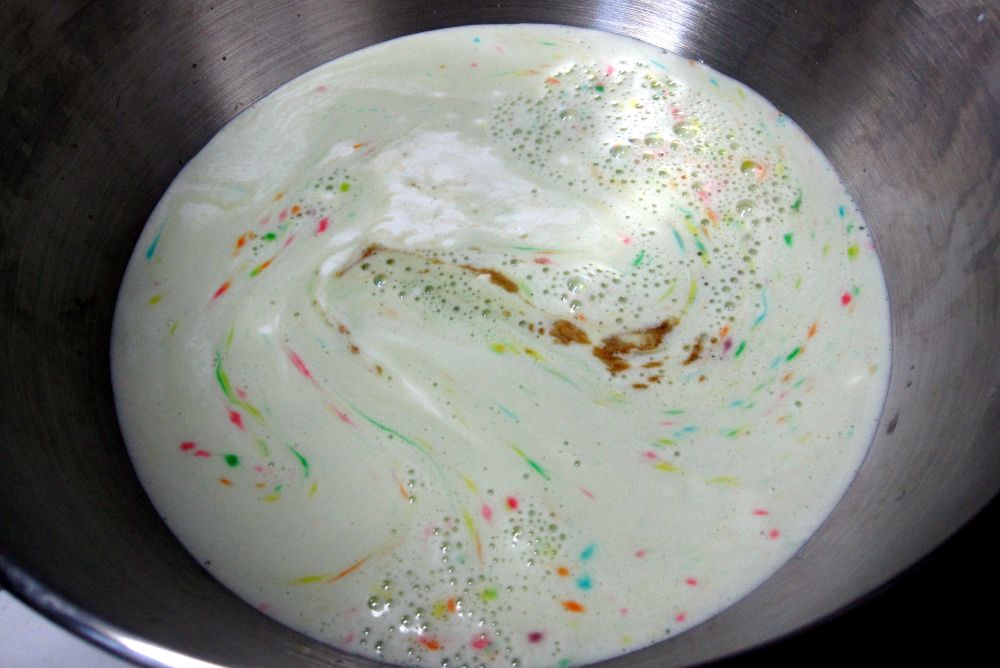
Honey ice cream base is ready to be chilled for at least 6 hours...

Once the ice cream base is chilled, churn in ice cream maker...

Add the cooled caramelized apples to the ice cream maker in the last 2 minutes of churning, just long enough to incorporate the apples into the ice cream...

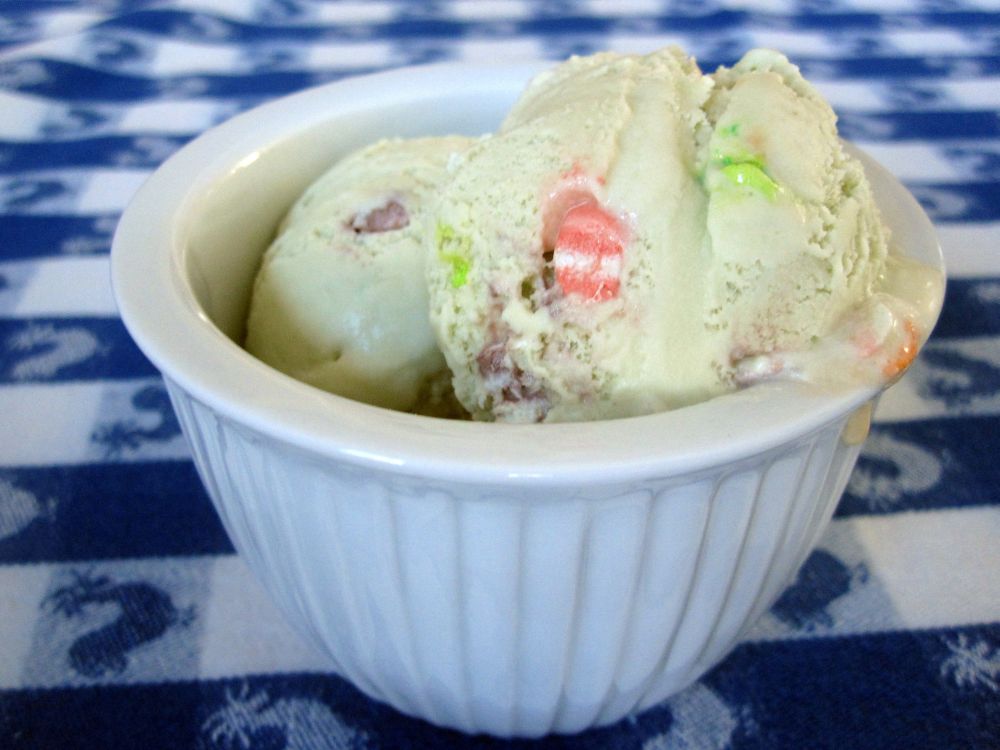
Allow the ice cream to set further in the freezer, then scoop and serve!

So creamy and delicious. Apples and Honey Ice Cream!

Tuesday, January 20, 2015

Life-Altering Super Creamy Peanut Butter Chocolate Chunk Ice Cream


I recently made a life-altering discovery: Jeni's Splendid Ice Cream. Jeni Britton, based in Cincinnati, Ohio, has developed a recipe for ice cream that is creamier and more scoopable than I've ever made before! Her technique is different from previous recipes I've tried. Her secret? A cornstarch-and-whole-milk slurry that gets added into the cream base, and cream cheese that gets whisked in at the end!

http://www.amazon.com/Jenis-Splendid-Ice-Creams-Home/dp/1579654363I have now made this peanut butter chocolate chunk ice cream recipe twice, and both times the ice cream was inexplicably, undeniably, bafflingly creamy. My husband says this is the ice cream of his dreams! (It doesn't hurt that it's peanut butter and chocolate either!) And I've made several other recipes by Jeni that use the cornstarch and cream cheese elements and they came out equally creamy. I'm convinced, from testing and retesting, and receiving consistent results of creaminess each time, that this method is a true winner!

I also love Jeni's ice bath technique, which is a game changer for me! Instead of putting the ice cream base into the fridge for at least 8 hours before churning like I've always been taught to do (ugh!), I can simply chill the base in an ice bath as soon as I've made it and then churn right away! I can have ice cream the same day I make the base! Instant gratification for impatient sweet tooths!

Make this ice cream and let me know what you think! May your peanut butter and chocolate dreams be fulfilled as sufficiently as my husband's!


Creamy Peanut Butter Chocolate Chunk Ice Cream
Adapted from a recipe by Jeni Britton Bauer in Jeni's Splendid Ice Creams at Home

Makes about 1 quart

2 cups whole milk
1 tablespoon plus 1 teaspoon cornstarch
3 tablespoons (1 1/2 ounces) cream cheese, softened
1/2 cup unsalted natural peanut butter (Skippy or Jif will do if you can't find natural)
1/2 teaspoon fine sea salt (add less salt if using salted peanut butter)
1 1/4 cups heavy cream
2/3 cup sugar
2 tablespoons light corn syrup
2 tablespoons honey
4 ounces dark chocolate of your preference, chopped

PREP
In a small bowl or ramekin, stir together 2 tablespoons of the milk with the cornstarch to make a smooth slurry. Set aside. In a medium bowl, whisk together the cream cheese, peanut butter, and salt until smooth. Make sure that medium bowl will ultimately be able to hold all of the ingredients. Set aside. Fill a large bowl with cold water. Set aside.

COOK
In a 4-quart saucepan, combine the remaining milk, the cream, sugar, corn syrup, and honey, and bring to a rolling boil over medium-high heat; boil for 4 minutes, watching to make sure the bubbles don't go over the edge of the pan. Remove from the heat, and gradually whisk in the cornstarch slurry. Bring the mixture back to a boil over medium-high heat and stir with a wooden spoon or heatproof spatula until slightly thickened and lightly coats the spoon or spatula, about 1 minute. Immediately, but pouring slowly, add this hot milk mixture into the medium bowl that has the cream cheese, peanut butter, and salt and whisk constantly until smooth.

ICE BATH
Add ice cubes or lunch box ice packs (I find ice packs work really well and I always have them ready even if I am out of ice!) into the large bowl of cold water to create an ice bath. Pour the ice cream mixture into a 1-gallon Ziploc freezer bag that is partially submerged in the ice bath and seal the bag. Then fully submerge the bag in the ice bath, using ice packs on top of the bag to weigh it down. Let stand, adding more ice or ice packs, until chilled, about 30 minutes.

CHURN
To churn the ice cream, cut off a small corner of the plastic bag and pour the ice cream base out into the frozen canister of your ice cream maker. Churn that delicious liquid!

While the ice cream is churning, melt the dark chocolate in a double boiler or in the microwave (but watch the microwave closely to make sure you don't burn the chocolate). Allow the chocolate to cool down to tepid but make sure it is still fluid enough that you can pour it. When the ice cream looks thick and creamy and only has a few more minutes of churning left, slowly pour the melted chocolate down the ice cream machine's opening at the top and you'll witness magic! The chocolate will solidify as it hits the cold ice cream, and be forced to break up into tiny pieces as the ice cream machine continues pushing the ice cream around inside. Turn off the machine after about 2 minutes of breaking up chocolate bits.

Transfer the ice cream to an airtight storage container and freeze in the coldest part of your freezer until it has firmed up enough to serve. This usually takes about 4 hours. Enjoy!

Monday, April 23, 2012

Salted Caramel Ice Cream...The Bi-Rite Creamery Way!


I had an out of body experience eating this ice cream. I had to pinch myself to make sure it wasn't a dream. If you've never gone to Bi-Rite Creamery in the Mission in San Francisco, you are really missing out. I remember when I was there last, I got caramelized bananas and they used a giant blow torch from a hardware store, not some dainty creme brulee kitchen torch. They mean business. But more importantly, I remember the salted caramel ice cream. That's because it's the flavor to be reckoned with. It's the flavor people travel far and wide for. And it's unreal.


This month, Bi-Rite released an ice cream cookbook to the world called Sweet Cream and Sugar Cones. Bi-Rite, the world thanks you! It means I can now make salted caramel ice cream at home. And living in L.A., it's not so easy to drive up to SF on a whim whenever I'm craving the stuff.


I saw that Serious Eats had posted the recipe and I decided it was important to test it out at home, make sure it was doable, that the recipe lived up to its reputation, and it wasn't just something to be left to the experts at the ice cream shop. If all went well, I would buy the cookbook because obviously where there's one to-die-for ice cream recipe, there are bound to be more.

Well, the ice cream lived up to its reputation. Ha! Understatement of the century. It was surprisingly doable, and the intense taste of salted caramel was unbeatable. The texture was perfectly smooth and so creamy that it felt almost too indulgent! Every spoonful was filled with guilt!

The bottom line is, I brought Bi-Rite Creamery to my L.A. kitchen and I'm so excited!


Salted Caramel Ice Cream
Adapted from a recipe in Sweet Cream and Sugar Cones by Kris Hoogerhyde, Anne Walker, and Dabney Gough

1 3/4 cups heavy cream, at room temperature
3/4 cup granulated sugar, divided
3/4 cup 1% or 2% milk
1 teaspoon kosher salt
5 large egg yolks

Note from Marni: Before you begin, be sure to read the instructions below completely. There are various ingredients to measure out or combine ahead, as well as having bowls, strainers, and even an ice bath ready. You'll be glad you prepped in advance because the recipe is time sensitive and you can't afford to be measuring things out while the mixture is cooking and you're stirring constantly. Consider yourself warned! :)

For the Caramel: Set a heavy bottom saucepan over the stove. Measure 1/2 cup of the sugar (the remaining 1/4 cup will go in with the egg yolks for the ice cream base). Start with 2 tablespoons of sugar from that 1/2 cup and place in the saucepan. Cook over medium-high heat until the sugar melts around the edges and turns an amber color, about 2 minutes. Add another 2 tablespoons of sugar until it melts, then continue, adding 2 tablespoons at a time until all the sugar is added and melted, stirring frequently. Be careful not to let the sugar burn; scrape the sides and bottom often.

When the caramel is a dark mahogony color, remove the saucepan from the heat and place it on a trivet. Immediately pour all of the cream in. Be very careful to use an oven mitt and protect your hand because the steam from adding the cream can burn you. Stir carefully to incorporate the cream so that no caramel lumps remain. If necessary because the lumps won't go away on their own, put the saucepan back on the stove and cook over low heat until the lumps are melted, then remove again from the heat.

For the Ice Cream Base: With the saucepan still off the heat, add the 3/4 cup milk and the salt to the caramel mixture and stir to blend. Place the saucepan back on the stove and cook on medium-high heat. Allow the mixture to reach a light simmer, barely bubbling, and then reduce the heat to medium.

In a medium heatproof bowl, such as a glass bowl, whisk together the 5 egg yolks and remaining 1/4 cup sugar.

Since you can't add this egg mixture directly to the ice cream base because the eggs will turn into scrambled eggs, you have to temper them first and bring their temperature up. To do that, carefully scoop out a 1/4 cup of the hot base mixture and whisk it into the egg yolks. The egg yolks will start to warm up. Add another 1/4 cup of the base mixture into the yolk mixture. Continue little by little until the eggs feel very warm when you touch the bottom of the glass bowl. They are now ready to be added back into the saucepan with the base. Pour all of the warmed up egg yolks into the saucepan, stirring constantly. Continue to cook the mixture over medium heat, stirring constantly, until the base is thick enough to coat the back of a heatproof spatula. This only takes about 2 minutes. You'll know it's ready if you run your finger across the back of the spatula and it leaves the mark of your finger.

Have another medium-size bowl ready, and sitting in an ice bath. Set a fine mesh strainer over the bowl. Pour the hot ice cream base through the strainer into the bowl. Stir the base constantly until it cools down from the ice bath and stops cooking. Cover the bowl with plastic wrap and place in the fridge overnight.

The following night, when the base is completely chilled, pour the base into the ice cream machine according to the manufacturer's instructions and churn for approximately 20 minutes until the ice cream has thickened to a soft serve consistency and the churning slows down. While it is churning, place the ice cream storage container in the freezer so it is really cold when the ice cream is ready and needs to be transferred into its container. Store the ice cream in the freezer and let it firm up for a few hours before serving. Then enjoy a little taste of San Francisco heaven!


The Making of Salted Caramel Ice Cream in Photos
The chilled base is ready to get churned into ice cream...

Pour the base into the ice cream maker...

It's done when the ice cream has thickened to a soft serve consistency and the churning slows down...

Transfer the ice cream to a cold container and store in the freezer to set for a few hours...

Scoop and enjoy!

Monday, November 14, 2011

A Tool to Help You Make My Award-Winning Lucky Charms Ice Cream


Remember that Award-Winning Lucky Charms Ice Cream I blogged about back in April? One of the steps for making the ice cream required separating the toasted oat grain cereal from the marshmallows. And as a dedicated ice cream maker, I handpicked those marshmallows out, one by one, because what else was I going to do? It was a labor of love.

But I just read in a blog that someone invented a sifter that almost perfectly separates the marshmallows from Lucky Charms cereal! I know you are celebrating quietly in your seat.

The only minor challenge is that you need to own a 3D printer (or become friends with an owner of one) because that's how you create your sifter. The sifter shape reminds me of a paper tea cup with holes in the bottom. So, go invest in a 3D printer and then make delicious Lucky Charms Ice Cream! How much do 3D printers cost? Small price to pay!

Step-by-step instructions for making your own sifter here.

Wednesday, April 20, 2011

Caramel Matzah Crunch Ice Cream: A Passover Dream Come True


Oh yes I did. I just put two of my favorite things (and I know they are also favorites for many of you!) together and it's all kosher-for-Passover!

You can call me a hero. Start celebrating a Happy Go Marni Day in your city. Post cardboard cut outs of me on your lawn. Write me onto the next presidential ballot. I just made Passover dessert more than simply tolerable! Hip Hip Hooray!


Made-from-scratch vanilla bean ice cream gets a Passover-themed flavor enhancement with the addition of tiny pieces of caramel matzah crunch, that chocolate caramel-covered matzah candy that the world can't live without on Passover. A-mazing! Both of these things are things I've blogged about separately before. So all they needed was a little love and marriage.


I knew I wanted to make ice cream for Passover, but I thought it would be more special if it had a distinctly Passover feel to it. I can't toss in regular candy pieces because of the corn syrup or other no-no ingredients. But caramel matzah crunch is something I make annually regardless, and broken up into tiny pieces, they resemble toffee bits! Sort of like Skor or Heath Bar bits.

The result is an ice cream that feels special for the holiday, but if you don't finish the batch by the end of Passover, it's perfectly delicious to continue consuming post-Passover. And you can't say that's true for a lot of other leftover desserts you might have when Passover ends. I see you through the computer screen, nodding in agreement. Try this!


Caramel Matzah Crunch Ice Cream
This recipe is my (very) successful attempt to marry Caramel Matzah Crunch by Marcy Goldman and Philadelphia-Style Vanilla Ice Cream by David Lebovitz
Makes about 1 1/2 quarts

3 cups heavy cream, or 2 cups heavy cream and 1 cup whole milk (honestly, 1% will work fine)
3/4 cup sugar
Pinch of salt
1 vanilla bean, split in half lengthwise
3/4 teaspoon Passover vanilla extract
Approximately 1 1/2 cups Caramel Matzah Crunch, broken up into little 1/2-inch pieces (see recipe below)

Pour 1 cup of the cream into a medium saucepan and add the sugar and salt. Scrape the seeds from the vanilla bean into the saucepan and add the pod to the pot. Warm over medium heat, stirring, until the sugar is dissolved.

Remove from the heat and add the remaining 2 cups cream (or the remaining 1 cup cream and the milk) and the Passover vanilla extract.

Chill the mixture thoroughly in the refrigerator overnight. When ready to churn, remove the vanilla bean, rinsing and reserving it for another use. I recommend straining the mixture into a new bowl because there might be tiny pieces of bark from the vanilla pod that you don't want in the ice cream. Then churn the mixture in your ice cream maker according to the manufacturer's instructions.

During the last 3-5 minutes of churning, when the mixture is pretty thick and almost of perfect consistency for soft serve ice cream, pour in the caramel matzah crunch bits and let the ice cream maker incorporate all the pieces. Transfer the ice cream to freezer containers and freeze for a few hours before serving to allow the ice cream to firm up a bit.


Caramel Matzah Crunch
4-6 unsalted matzahs
1 cup (2 sticks) unsalted butter or unsalted Passover margarine
1 cup firmly packed brown sugar
3/4 cup coarsely chopped chocolate chips or semi-sweet chocolate

Preheat the oven to 375°F. Line a large (or two smaller) cookie sheet completely with foil. Cover the bottom of the sheet with baking parchment — on top of the foil. This is very important since the mixture becomes sticky during baking.

Line the bottom of the cookie sheet evenly with the matzahs, cutting extra pieces, as required, to fit any spaces.

In a 3-quart, heavy-bottomed saucepan, combine the butter or margarine and the brown sugar. Cook over medium heat, stirring constantly, until the mixture comes to a boil (about 2 to 4 minutes). Boil for 3 minutes, stirring constantly. Remove from the heat and pour over the matzah, covering completely.

Place the baking sheet in the oven and immediately reduce the heat to 350°. Bake for 15 minutes, checking every few minutes to make sure the mixture is not burning (if it seems to be browning too quickly, remove the pan from the oven, lower the heat to 325°, and replace the pan).

Remove from the oven and sprinkle immediately with the chopped chocolate or chips. Let stand for 5 minutes, then spread the melted chocolate over the matzah. Chill, still in the pan, in the freezer until set. Break into squares or odd shapes.


Step-by-Step in Pictures
Note: Additional photos can be found on my original posts for Caramel Matzah Crunch and Philadelphia Style Vanilla Ice Cream.

After the ice cream mixture has chilled in the fridge overnight, remove it from the fridge...

Strain the mixture into a new bowl to catch the vanilla pod and any tiny pieces of vanilla bark...

Pour into the ice cream maker...

When the ice cream is almost done, and thick but still moving easily in the machine, pour in the Caramel Matzah Crunch bits...

Churn with the candy bits for about 3 minutes, until fully incorporated...

Transfer to a freezer container and place in freezer to allow the ice cream to firm up...

Scoop and serve! You are in for a real Passover treat!

Sunday, April 10, 2011

My Award-Winning Lucky Charms Ice Cream


My friends Brittany and Bryan invited me to a BYOIC party. BYOIC as in bring-your-own-ice-cream party. It was Bryan's 31st birthday, and that calls for an ice cream-themed party! Duh! They mentioned in the invite that there'd be prizes for the best flavors. Well, I had no idea what others were bringing. What if they brought the same flavor I brought! (Gosh, have I always been this competitive?) So I decided to invent a flavor to make from scratch, and the weirder the better.

Presenting: Lucky Charms Ice Cream. Because why not? The cereal is sugary and delicious. And you know how when you eat a bowl of cereal, there's typically a little bit of milk at the bottom of the bowl after you've already eaten the last of the cereal bits? And that milk takes on the flavor of the cereal? That flavored milk is what I wanted for this ice cream!


So next up was figuring out how to recreate that flavor. What I decided to do was steep two cups of Lucky Charms in a hot mixture of cream, milk, sugar, and salt, then strain out the soggy cereal (because who likes soggy cereal?), and then when the ice cream was churning in the ice cream maker and almost done, toss in fresh Lucky Charms marshmallows, which I had handpicked out of the cereal box.


It worked! I can't believe it! It worked! The ice cream really does taste like Lucky Charms! And it's not gross at all! It's quite delicious! And it's light green in color because during the steeping process, the colors from the marshmallows sort of melted into the mixture and green was the prominent color.

The amazing, exhaustive toppings bar
prepared by Brittany and Bryan


I brought the ice cream to the party Saturday night, having only churned it a few hours earlier. It could have used a day to firm up in the freezer, but I ran out of time. So when people tasted the ice cream, it was VERY soft serve. Still, they got the idea. And at voting time, it won second place! Out of what must have been 20 flavors! It lost only to a homemade chocolate strawberry ice cream my friends Alison and Dan brought. Can't complain there. :-) And my prize? Baskin Robbins gift certificates. How apropos.

Lucky Charms Ice Cream, my award-winning invention. Who would have thought?


Lucky Charms Ice Cream
Recipe by Happy Go Marni
Makes about 1 1/2 quarts

2 cups heavy cream
1 cup milk (whole milk is preferable but I used 1% because it's all I had and it worked fine)
3/4 cup sugar
Pinch of salt
3/4 teaspoon vanilla extract
2 cups Lucky Charms cereal (cereal bits and marshmallows combined)
1 1/2 cups Lucky Charms marshmallows (separate them out of the box)

In a saucepan, heat 1 cup cream and the milk, sugar, and salt until very hot. Remove from heat, add the 2 cups of Lucky Charms cereal, cover with a lid, and allow the cereal to steep and flavor the mixture for at least 25 minutes, up to an hour.

Place a strainer over a heat-proof bowl and pour the mixture through to strain out the soggy cereal. Remove the strainer. Add the remaining 1 cup cream and the vanilla. Stir. Cover the bowl with plastic wrap and place in fridge to chill overnight.

Churn ice cream in your ice cream maker. When the mixture has thickened significantly and is almost done (about 3 minutes before done), toss in the 1 1/2 cups Lucky Charms marshmallows. As soon as they appear incorporated into the ice cream, turn off the machine and transfer to a container to freeze so the ice cream can firm up a bit. Serve and enjoy!


Step-by-Step in Pictures
Heat 1 cup cream, the milk, sugar, and salt in a saucepan...

Once the milk mixture is hot, remove from the stove, pour in two cups of Lucky Charms, and cover to steep for 25 minutes to an hour...

When the Lucky Charms are done steeping, they'll look like this...

Strain the Lucky Charms out of the mixture over a heat-proof bowl...

Add the remaining cup of cream and the vanilla...

Stir, then cover with plastic wrap and refrigerate overnight...

Handpick marshmallows out of the cereal box to prepare for folding into the ice cream at the end...

Pour the ice cream mixture into the ice cream maker...

Let the ice cream get pretty thick, about 20 minutes...

Toss in the marshmallows when the thickness of the ice cream is just about ready...

Continue churning with the marshmallows until they are fully incorporated, 2-3 minutes...

Transfer to a container to store in the freezer...

Scoop up and enjoy!
Related Posts with Thumbnails