Showing posts with label muffins. Show all posts

Tuesday, June 15, 2010

Miniature Chile Frittatas


I've been on a creative salad kick. Practically every night lately, I've been making my own salads at home, where I keep experimenting with different fruits, vegetables, nuts, cheeses, and other toppings to mix in. My current obsession is thinly sliced apple, dried cranberries, feta cheese, carrots, celery, and my friend's homemade spicy challah croutons all on a bed of romaine lettuce and a dressing of olive oil, balsamic vinegar, Maldon sea salt and freshly cracked pepper. So far so good, right? Well, the only thing missing from this salad craze is the word "comfort." As delicious as these salads are, they aren't comfort food and I'm not sinking my teeth into something soft or chewy or substantial.


The perfect addition to a main course salad is a little slice of quiche or...this miniature chile frittata! The recipe comes from the Allied Arts Guild in Menlo Park, a place I remember fondly for its beautiful gardens. It's so easy to make these I'd wager just about anyone could do it. There's very little technique involved, aside from, perhaps, identifying when they're done baking.

This frittata is a dairy frittata, stuffed to the brim with Monterey Jack and Cheddar cheeses and cottage cheese. If you're making this for a dairy Shabbat (because yes, dairy meals are awesome!), it would go great with a salmon main course. You stir in diced green chiles, which, just to clarify, are NOT very spicy, and there are five eggs, but to cut down on the unhealthy factor, I used Egg Beaters for three of the five eggs. Worked like a charm! The result is an adorable, fits-in-your-hand mini frittata with flecks of green and red and a golden hue from the cheese on the surface. Best of all, it screams "comfort"!


Miniature Chile Frittatas

Recipe adapted from Tastes, Tales and Traditions, presented by the Palo Alto Auxiliary For Children
Makes about 40 mini muffin-sized frittatas or about 16 regular muffin-sized frittatas

1 cup small curd cottage cheese
5 eggs, beaten (I used 3 Egg Beaters eggs and 2 regular)
1/4 cup all-purpose flour
1/8 teaspoon cayenne pepper, or to taste (I substituted a few drops of Tapatio hot sauce instead)
1/4 teaspoon salt
1/4 cup (1/2 stick) butter, melted
2 (4-ounce) cans diced mild green chiles, drained
2 cups (8 ounces) shredded Monterey Jack cheese or a mixture of Monterey Jack cheese and Cheddar cheese or lite shredded cheese mixture
1/2 teaspoon baking powder

Blend the cottage cheese in a food processor or mixer until smooth (I actually left some lumps; it doesn't matter).

Add the eggs, flour, cayenne pepper (or hot sauce) and salt. Do NOT add the baking powder yet. Beat until well blended.

Stir in the butter, chiles and cheese.

Chill, covered, for 2 to 24 hours before baking. I waited about 3 hours and the mixture was perfectly thickened and set.

Line the muffin pan with paper liners or spray the muffin pan directly with Pam. Preheat oven to 350 degrees. Add the baking powder to the chilled mixture and mix well.

Spoon 1 tablespoonful of batter into each muffin cup if using a mini muffin pan; fill 3/4 full if using a regular size muffin pan. Bake for 15 to 20 minutes for miniature muffin pan, 20 to 24 minutes for regular size pan, or until frittatas are puffed and golden brown. Let stand until slightly cool; run a sharp knife around each frittata to loosen. Serve hot or at room temperature.

If you want, you can bake the frittatas ahead. Just cool completely before wrapping tightly. Chill in the refrigerator until ready to serve. Reheat in a preheated 350-degree oven for 5 to 8 minutes.


Step-by-Step in Pictures
Mix the cottage cheese until you get rid of most of the lumps...

Add the eggs, flour, cayenne, and salt...

Beat until well blended...

Add the butter, cheese, and chiles, then chill, covered, for 2 to 24 hours...

Take the mixture out of the fridge and stir in the baking powder...

Fill each muffin cup about 3/4 full...

Bake at 350 degrees for about 20 minutes...

Let cool, then enjoy!

Monday, February 8, 2010

Financiers au Chocolat, A.K.A. Individual Chocolate Almond Cakes


I'm always looking for an excuse to use my almond extract. I don't get many opportunities because I serve some pretty picky eaters, and for some reason, almond extract goes hand-in-hand with nuts, raisins, onions, and a few other most-commonly-avoided ingredients among friends (and children....huh, strange coincidence). This is so annoying since I love all those foods! But I decided I would make these chocolate almond cakes because they sound excellent, easy, and I'd be offering them at a party attended by mature palates. The sissies can just deal!

The recipe is inherently good because of its author, David Lebovitz. But one taste and you don't need to be sold based on author. The instructions say to finely grind the almonds, but I left mine slightly coarser because I wanted some crunch in the cakes. Either way works great. And don't you just love the French name? Financiers au Chocolat. It's so pompous and showy in all the right ways! It allows a silly little home baker like me the chance to make something that sounds way harder than it is, as if I attended a cooking school in Paris or something.

If you're a fan of almonds, then you're in for a treat.


Financiers au Chocolat, A.K.A. Individual Chocolate Almond Cakes
Recipe by David Lebovitz in The Sweet Life in Paris

Makes 15.

6 tablespoons (90 g) unsalted butter, plus more for greasing the pan
1 cup (90 g) sliced almonds
3 tablespoons (25 g) unsweetened Dutch-process cocoa powder (preferably Valrhona)
1 tablespoon (10 g) flour
1/8 teaspoon salt
3/4 cup (90 g) confectioners' sugar
1/3 cup egg whites, at room temperature
1/4 teaspoon almond extract

1. Preheat the oven to 425 degrees F. Lightly butter mini-muffin tins or a silicone baking mold with 1-inch round indentations and place on a sturdy baking sheet.

2. Melt the butter in a small saucepan and set aside until room temperature.

3. In a food processor or blender, finely grind the almonds with the cocoa, flour, salt, and sugar.

4. Transfer the mixture to a medium bowl.

5. Stir the egg whites and almond extract into the ground almond mixture, then gradually stir in the melted butter until smooth and fully incorporated.

6. Spoon the batter into the molds, filling them three-quarters full.

7. Bake for 10 to 15 minutes, until slightly puffed and springy to the touch. Remove from the oven and cool completely before removing from the molds.

Storage: Once cooled, financiers can be kept in an airtight container at room temperature for up to one week. The batter can also be made, then chilled and baked up to five days later.


Step-by-Step in Pictures

Finely grind together the almonds, cocoa, flour, salt, and sugar in a food processor...

Transfer that dry mixture to a bowl and stir in the egg whites and almond extract...

Stir in the melted butter...

Mix just until incorporated...

Spoon the mixture into greased muffin cups, filling them 3/4 full...

Bake at 425 degrees F for 10-15 minutes...

Let cool in the pan completely, then carefully remove from the pan...

Monday, August 31, 2009

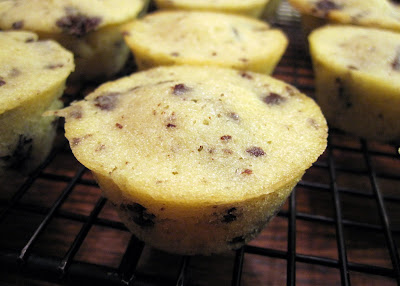
Chocolate Chunk Vanilla Muffins


I absolutely love these muffins. I made them for the morning of my sister's wedding one week ago. All the bridesmaids would be over, getting themselves beautiful, and my mom and I thought it would be fun to have a little spread of yummy treats. So these muffins were prepared, along with banana chocolate chip cake, individual cups of yogurt, fresh fruit, trail mix, and mimosas. It was lovely!

I wouldn't normally make something called vanilla muffins because it sounds too plain. Sorta like how I never make yellow cake because chocolate cake is always going to be better. :-) But something about Carole Walter's recipe lured me in. Plus, I got to add fancy Valrhona dark chocolate chunks into the batter. These muffins are perfect in both texture and taste. Never question Carole Walter!


Chocolate Chunk Vanilla Muffins
Recipe by Carole Walter in Great Coffee Cakes, Sticky Buns, Muffins, and More

1 1/2 cups all-purpose flour, spooned in and leveled
3/4 teaspoon baking powder
1/2 teaspoon salt
1/4 teaspoon baking soda
1/2 cup (1 stick) unsalted butter, slightly firm
2 teaspoons pure vanilla extract
1 cup granulated sugar
2 large eggs
1/2 cup sour cream
1 (3.5 ounce) bar fine-quality bittersweet chocolate, such as Lindt, cut into 1/4-inch dice
3 to 4 tablespoons sparking sugar, optional

1. Position the rack in the lower third of the oven. Heat the oven to 375 degrees F. Line a muffin pan with paper or foil cupcake liners.

2. In a large bowl, thoroughly whisk together the flour, baking powder, salt, and baking soda. Set aside.

3. Cut the butter into 1-inch pieces and place in the bowl of an electric mixer fitted with the paddle attachment. Add the vanilla and mix on medium speed until smooth and lightened in color, about 1 minute.

4. Add the granulated sugar in four additions and mix for 1 minute longer. Scrape down the side of the bowl. Blend in the eggs, one at a time, and mix for another minute.

5. Reduce the mixer speed to low and add the flour mixture alternately with the sour cream, dividing the dry ingredients into two parts, starting and ending with the flour. Mix just until blended after each addition. When the bowl is removed from the mixer, fold in the chocolate chunks using an oversize rubber spatula.

6. Portion the batter into the prepared pan using a no.16 ice cream scoop (1/4-cup capacity). Sprinkle the top of each muffin with about 1/4 teaspoon of the sparking sugar.

7. Bake for 23 to 25 minutes, or until the muffins are golden brown and the tops are springy to the touch. To ensure even baking, toward the end of baking time, rotate the pans top to bottom and front to back. Remove from the oven and place on a rack to cool.

Storage: Store at room temperature, tightly wrapped in aluminum foil, for up to 3 days. These muffins may be frozen.


Step-by-Step in Pictures

Combine the dry ingredients, then set aside...

Mix the butter and vanilla until smooth and light in color...
Add the sugar and then the eggs...
Add the dry ingredients alternately with the sour cream, ending with dry...

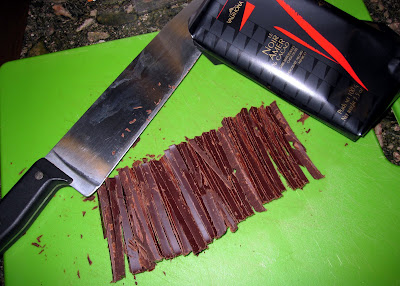
Chop the chocolate with a sharp knife...

You want 1/4-inch chunks...

Fold the chocolate chunks into the batter...

Stop folding as soon as the chocolate is combined...

Distribute evenly in muffin tins...

Bake at 375 degrees F for 23-25 minutes (10-13 minutes if making mini muffins)...

Yum!

Thursday, May 29, 2008

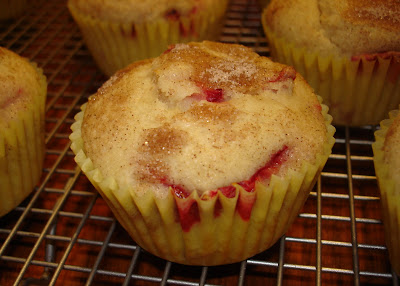
Strawberry Muffins


It's the time of year when you can buy three baskets of strawberries for $5 at the farmer's market. I currently have enough strawberries for munching and baking and then some!

I remember my mom making a great strawberry muffin recipe when my grandparents came for a Sunday brunch many years ago. So today I called up my mom for the recipe and she knew exactly what I was talking about. Finding it among her cookbook collection was another story. But I have it now, and you have it now, too!


Strawberry Muffins
From Pampered Chef's Recipes from the Heart Cookbook

Batter
2 cups all-purpose flour
1/2 cup sugar
1 Tbsp. baking powder
1/2 tsp. salt
1 egg
3/4 cup milk
1/3 cup vegetable oil
1 cup chopped fresh strawberries

Topping
1 Tbsp. sugar
1/4 tsp. ground cinnamon

Preheat oven to 400 degrees F. Line 12 medium muffin cups with paper liners, or grease bottoms only. For batter, combine flour, sugar, baking powder, and salt in large bowl. In small bowl, whisk egg, milk and oil. Add to dry ingredients; stir until just moistened. (Batter will be lumpy.) Gently stir in strawberries. Spoon batter into prepared muffin cups, filling each cup two-thirds full. For topping, combine sugar and cinnamon in small bowl; sprinkle evenly over batter in cups. Bake 20-25 minutes or until golden brown. Yield: 12 muffins.

Step-by-Step in Pictures


Friday, March 28, 2008

Motor Muffins and Cupcake Cars

Something I saw on Boing Boing this morning...

This is pure genius! I think I once had a dream that my vehicle was a monster cupcake. Then I woke up and realized I could only eat them. Till now!

[source: Make Magazine]


And check out these cars in action!!!!

Related Posts with Thumbnails