Monday, June 20, 2011

Oatmeal Chocolate Chip Cake with Cream Cheese Frosting


I made this back in January for my birthday. I love oatmeal cakes, cookies, breads. Pretty much anything with oatmeal. I have an oatmeal cookie recipe I want to share with you soon, too. I also eat a lot of oatmeal for breakfast. Oatmeal is a big part of my life. Since this cake recipe is simple, and every ingredient called for is part of my pantry staples (other than cream cheese...I'll admit I don't stock EVERYTHING regularly), it was an easy sell for me to choose this recipe.

You'll notice that you toss flour with the chocolate chips before they go into the batter. It's a great technique for preventing the chips from falling to the bottom of the cake. Though isn't it funny how there's a famous quote: "Let the chips fall where they may." That quote definitely doesn't apply to cakes! I encourage you to try this trick in other cake recipes that call for chocolate chips. It really works!

And if you're in the mood for cupcakes, I'm sure this cake would lend itself perfectly to cupcakes instead of a 9x13-inch cake.


Oatmeal Chocolate Chip Cake with Cream Cheese Frosting
Adapted from a recipe by Matt Lewis and Renato Poliafito in Baked Explorations

8 ounces chocolate chips
1/2 teaspoon bourbon, Scotch, or favorite liquor
1 1/2 cups plus 2 tablespoons all-purpose flour
1 cup rolled oats
1/2 cup (1 stick) unsalted butter, cut into small cubes, at room temperature
2 eggs, slightly beaten
3/4 cup granulated sugar
1 1/4 cups firmly packed dark brown sugar
1/2 teaspoon salt
1 teaspoon baking soda
1 teaspoon baking powder
1 1/2 teaspoons cinnamon

Preheat the oven to 375 degrees F and position the rack in the center. Grease the sides and bottom of a 9x13-inch pan (either glass or light-colored metal). Measure 1 1/4 cups water and bring to a boil (microwave works well for this).

In a small bowl, combine the chocolate chips and bourbon and toss to coat. Sprinkle the 2 tablespoons of flour over the chips and toss to coat. Set aside.

In a large bowl, combine the oats and cubed butter. Pour the boiling water over the oat-butter mixture, leave it alone for 30 seconds, then stir to melt the butter. Set aside for 25 to 30 minutes.

In another large bowl, whisk together the eggs, granulated and dark brown sugars, salt, baking soda, baking powder, and cinnamon until well combined. Add the cooled oatmeal mixture and fold it in to incorporate. Then gently fold in the remaining 1 1/2 cups flour and the chocolate chips. Pour the batter into the prepared pan.

Bake the cake for 38 to 45 minutes. You'll know the cake is done when you insert a cake tester or toothpick in the center and it comes out clean.

Let cool on a wire rack for at least 30 minutes.

Prepare the Cream Cheese Frosting (see recipe below). Spread a thin layer of frosting over the entire top surface of the cooled cake. Chill the cake in the fridge for 15 minutes to set the frosting before serving. Store leftover cake in the fridge, tightly covered. If you haven't frosted the cake yet, you can leave the cake, tightly wrapped, out on the counter (doesn't need to be chilled unless there's cream cheese frosting).

Cream Cheese Frosting
5 tablespoons unsalted butter, softened
5 1/2 ounces cream cheese, softened
2 cups confectioners' sugar, sifted
3/4 teaspoon pure vanilla extract

Using a stand mixer with the paddle attachment, beat the butter until very smooth. Add the cream cheese and beat until smooth.

Add the confectioners' sugar and vanilla and beat again, about 1 minute. Cover the bowl with plastic wrap and chill in the fridge for at least 30 minutes. If you want, you can prepare this frosting the day before, just remove from the fridge and let it soften before you attempt to spread it on the cake.


Step-by-Step in Pictures
Place chocolate chips, bourbon, and flour in a small bowl...

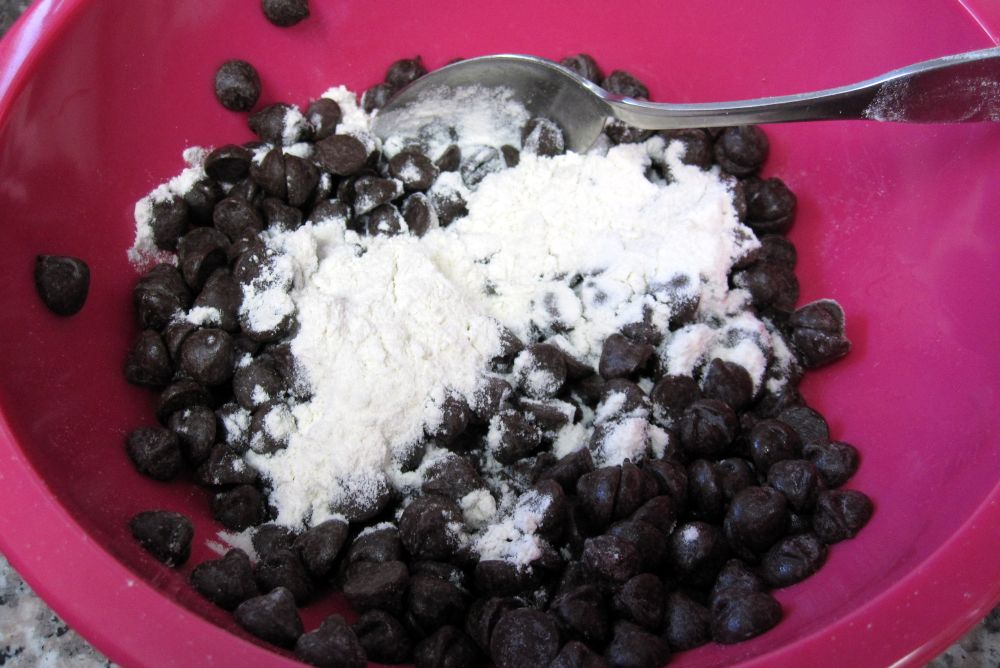
Toss to coat the chips with the flour...
In a large bowl, combine the oats and cubed butter...
Pour boiling water over the oats and butter...

Let stand 30 seconds, then stir to melt the butter; set aside for 25 minutes...
In another large bowl, whisk together eggs, both sugars, salt, baking soda, baking powder, and cinnamon...

Add the cooled oatmeal mixture and stir to combine...

Fold in the flour...

Stir in the chocolate chips...
Pour the batter into the prepared pan and bake at 375 degrees F for 38 to 45 minutes...

To make the Cream Cheese Frosting, beat the butter until smooth...
Add the cream cheese...
Add the confectioners' sugar...

Add the vanilla, then chill the frosting in the fridge for 30 minutes...

Frost the cooled cake...

Friday, June 10, 2011

Peanut Butter and Jelly Bars, Best Served in a Metal Lunch Box


This'll bring you back to your childhood. Though when I offered it to coworkers and asked them if they felt nostalgic, they responded that peanut butter and jelly sandwiches are still a very real part of their lives...and no, they're not parents yet. I guess I haven't been paying close enough attention to what my coworkers have been eating for lunch!


These bars are really simple to prepare because the bottom layer is the same as the top layer, just that the bottom is pressed together and the top is crumbled and sprinkled over the jelly layer. I used raspberry preserves as my jelly ingredient and it had the perfect consistency - not overly liquidy like a fruit sauce, but not so solid that it doesn't spread easily. With the raspberry preserves' rich red hue, the cross section of these bars is beautiful. In fact, you should celebrate the fact that some of the jelly oozes out the sides. Way more visual drama! And tossing salted peanuts on top adds both crunch and a salty-sweet flavor.

I made a lot of people really happy with this treat. I guess that makes it a keeper! Maybe next time I'll feed a batch to kids and see if I get as good a reaction. :)


Peanut Butter and Jelly Bars
Adapted from a recipe on Page 99 in the March 2011 Bon Appetit magazine

1 1/2 cups unbleached all-purpose flour
1/2 teaspoon baking powder
1/4 teaspoon salt
3/4 cup smooth peanut butter
3/4 cup packed light brown sugar
1/2 cup (1 stick) unsalted butter, at room temperature
1 large egg
1 teaspoon vanilla extract
3/4 cup grape, strawberry, or raspberry jelly
2/3 cup coarsely chopped salted dry-roasted peanuts

Preheat oven to 350 degrees F. Line an 8x8x2-inch metal baking pan with foil, leaving an overhang for lifting up out of the pan later. Spray the bottom and sides of the foil lining with nonstick cooking spray.

Whisk the dry ingredients together in a small bowl: flour, baking powder, and salt. Set aside.

In a stand mixer or bowl with electric hand mixer, beat the peanut butter, brown sugar, and butter until smooth. Add in the egg and vanilla and beat on low speed until well incorporated. Beat in the dry ingredients on low speed just until blended (and not a moment more!).

Divide dough in half. Wrap half of the dough in plastic wrap and freeze for 10 minutes. Place the remaining half in the foil lined pan and press down to cover the bottom.

Pour jelly or preserves on top of the dough layer in the pan and spread evenly to cover.

Remove the dough from the freezer, break it up into pieces the size of grapes, and scatter on top of the jelly layer. Finally, sprinkle the salted peanuts on top.

Bake the bars until the top is golden brown, about 28-30 minutes. Cool completely in the pan on a wire rack. Then lift the foil overhang up and place the bars on a cutting board. Cut into 16 squares, or make smaller pieces (which I prefer doing so you can feel like you can have more than one). Store in an airtight container at room temperature. Note: You can make these 3 days ahead. They keep really well!


Step-by-Step in Pictures
Whisk together the dry ingredients; set aside...

Beat together the butter, brown sugar, and peanut butter...
Beat in the egg and vanilla...

Add in the dry ingredients...

Divide dough in half...
Press half the dough into the bottom of the pan, chill the other half of the dough in the freezer for 10 minutes...

Spread the jelly over the dough in the pan...

Cover the dough layer completely with the jelly...

Break the chilled dough into grape-size pieces and sprinkle them on top of the jelly...

Sprinkle the salted peanuts on top and bake at 350 degrees F for about 30 minutes...

Cool completely before cutting into squares and serving. Enjoy!

Sunday, May 29, 2011

Chocolate-Orange Cupcakes with Bittersweet Chocolate Frosting


My cousin Jessica got married last weekend in a beautiful ceremony at a lakeside venue in Agoura Hills, California. She looked stunning! Her groom Alex is a lucky guy! And we're lucky to have Alex in our family now.


Family came in from all over and if there's one thing you should know about me by now, it's that sweet tooths and great bakers run in the family. My mom, my cousin Rachael (sister of the bride), a family friend, and I all baked for a dessert party hosted at the hotel the night before the wedding. It was a fitting event for our extended family.


Incredibly (but true), Rachael, with the help of a friend, spent two days in the kitchen and also made a dessert bar for the wedding reception, which featured a whopping 12 kinds of treats, everything from cookies, to truffles, to cupcakes. She outdid herself. And then, the sweet tooth-y relatives, who are used to this sort of over-the-top sugar overkill and would probably never admit something was "too rich," descended upon these treats, giving their inevitable thumbs-up. It was by far the most desserts I've ever seen at a wedding. And I didn't even mention there was a wedding cake, too.


These chocolate-orange cupcakes are really delicious and easy to make. I brought them to the dessert party. The trick to making them elegant is putting the frosting into a piping bag and piping swirls onto the top of each cupcake. It brings a bakery-like quality to them, despite being as homemade as homemade can be!


Chocolate-Orange Cupcakes with Bittersweet Chocolate Frosting
Adapted from a recipe in The Williams-Sonoma Baking Book

3 tablespoons Dutch-process cocoa powder
1/4 cup hot water
1 1/4 cups all-purpose flour
1/2 teaspoon baking powder
1/2 teaspoon baking soda
1/4 teaspoon salt
1 orange
2 large eggs, at room temperature
3/4 cups granulated sugar
1/2 cup buttermilk, at room temperature
1/2 teaspoon pure vanilla extract
1/4 cup unsalted butter, melted and cooled to room temperature

For the frosting:
6 ounces bittersweet chocolate
1 cup unsalted butter, at room temperature
2 cups confectioners' sugar

Preheat the oven to 350 degrees F. Line 12 standard muffin cups with paper liners or 36 mini cupcake cups (which is what I did).

In a small glass measuring cup, heat water until very hot in the microwave and then stir in the cocoa until it dissolves; set aside.

In a bowl, sift the dry ingredients together: flour, baking powder, baking soda, and salt. Zest the orange and add the zest to the dry ingredients, stir, and set aside.

In the bowl of a stand mixer or a large bowl with an electric hand mixer, beat the eggs and granulated sugar until well blended. Beat in the buttermilk and vanilla, then the cocoa-water. Blend in the melted butter, and then add the dry ingredients.

The batter will be a bit thin, so carefully spoon enough batter into each muffin cup to fill it about half full. Bake until the tops of the cupcakes have puffed up and appear set and a cake tester inserted into the center of a cupcake comes out clean. For regular-sized cupcakes, this should take about 15 minutes, for mini cupcakes, check at about 9 minutes. Cool the cupcakes in their pan on a wire rack, then gently lift them up and remove from the pan.

To make the frosting, melt the chocolate in the microwave or in a double boiler. While the chocolate is cooling to room temperature, beat the butter and confectioners' sugar in a stand mixer fitted with the paddle attachment on medium speed until the mixture is creamy and smooth. This takes about 3 minutes. Beat in the melted, cooled chocolate until thoroughly combined. Fill a pastry bag with the frosting and use a large star tip to pipe a spiral onto each cupcake. Refrigerate the cupcakes to set the frosting, but take out of the fridge at least 30 minutes before serving so they are not chilled.


Step-by-Step in Pictures
Combine the dry ingredients. Add the orange zest and set aside...

Beat together the eggs and sugar...
Beat in the buttermilk and vanilla...
Add the cocoa-water, then the melted butter...

Blend in the dry ingredients...

Stir just until combined...

Spoon the batter into the muffin cups, filling halfway...

Bake at 350 degrees for 15 min (for regular size cupcakes) and 9 minutes for mini cupcakes. Cool completely before frosting the tops...

To make the frosting, beat the butter and confectioners' sugar...

Add the melted chocolate...

Stir until well blended...

Pipe the frosting into spirals on top of the cupcakes...

Monday, May 16, 2011

Bessie's Chocolate Fudge Squares Stuffed with Peanut Butter Cups


I was at the grocery store recently shopping for basics like milk, eggs, and bananas. I had no intention of veering off the path. And then I struck gold. I approached the Easter candy sale section and my eyeballs almost flew out of their sockets. First of all, I thought I had missed my chance to get Easter candy on sale because it was already several days after the holiday. In fact, I had already mourned that lost opportunity and moved on with my life. Second, giant bags could be mine for just $1.20 per bag. I gave in and put several bags in my cart - a few Cadbury mini eggs, Reese's, and some other stuff.

I wish I could tell you it was a tough decision and my brain was fighting my hand not to pick up any candy. But that's not how this experience played out. I don't think my hand-reaching could have been any speedier or more certain. There was no pause, no trembling, just one beautiful straight grab and it was over.


I don't view this at all as lack of will power. I view it as investment, because Reese's Peanut Butter Cups shaped in the form of Easter eggs are still just Reese's Peanut Butter Cups. The ingredients are the same. I can buy these and use them in baking as if there were no difference. And I knew when I bought this giant bag of Reese's exactly what I was going to do with the eggs. They were going in brownies.


The only thing left to do was decide on a brownie recipe. I pulled out my family cookbook and found a recipe my aunt had submitted for Bessie's Chocolate Fudge Squares. Bessie was the housekeeper that many of my relatives on my mom's dad's side shared back in the 1950s and 60s in Youngstown, Ohio. The brownies are more on the cakey side than the fudgy side, and I'm more of a fudgy girl, but they work really well with a stuffing of peanut butter cups. I'm quite pleased with my $1.20 purchase.


Bessie's Chocolate Fudge Squares Stuffed with Peanut Butter Cups
Adapted from a recipe by Bessie Anglun, a housekeeper that worked for my mom's paternal family in Youngstown, Ohio, that was submitted by my aunt Linda to our family cookbook

1/2 cup (1 stick) butter
2 squares unsweetened chocolate
1 cup sugar
3 eggs
1 cup flour
1 teaspoon baking powder
1/2 to 1 cup toasted nuts, optional
1 teaspoon vanilla
12 Reese's Peanut Butter Easter Eggs or Cups

Melt butter and chocolate together in a medium saucepan. Remove from heat and add sugar. Beat in eggs, one at a time. Mix in flour, baking powder, nuts, and vanilla. Place in greased and floured (or sprayed with nonstick cooking spray) 9-inch or 8-inch square baking pan. Bake at 350 degrees F for 15-25 minutes.


Step-by-Step in Pictures
Melt the chocolate and butter...

Remove from heat and add the sugar...
Add the eggs, one at a time...
Add the dry ingredients...

Add the vanilla...
Spread about half the brownie batter in the bottom of the prepared pan, then evenly distribute the Reese's Peanut Butter cups/Easter eggs on top...

Spread the remaining batter on top of the Reese's Peanut Butter cups...
Bake at 350 degrees F for 15 to 25 minutes...

Cut into squares and serve...
Related Posts with Thumbnails