Thursday, April 23, 2009

Coffee Ice Cream


I think coffee ice cream is magical. It's a flavor that even some of my non-coffee-drinking friends still enjoy as an ice cream. Of course if you're a coffee drinker like I am, then coffee ice cream might be sheer euphoria. And I'm all for strong flavor; I drink my coffee black and want to taste the quality of the beans without the distraction of cream and sugar.

This ice cream recipe by David Lebovitz is outstanding. Be sure to select carefully the coffee beans you use for it because they will determine the taste of the end product. Since the recipe calls for a cup and a half of beans that you're going to discard afterward, I went to Trader Joe's and got one of those large cheap canisters of a bold coffee. I figured that way if I screwed up or the recipe wasn't as dreamy as I had hoped, I didn't invest too much. Well, I've got a couple of things to say about that. First, I was an idiot to question for even a second that a David Lebovitz ice cream could be anything less than perfect. Second, the Trader Joe's coffee was fantastic, and so now I know I can get away with making great ice cream from cheap beans.

Every time you make this ice cream, it will come out differently. Think of the possibilities. I mean, no two brews are alike, plus, if you keep trying different coffee brands, you'll keep getting different ice creams! Next time I'm going to try Dunkin' Donuts French Vanilla coffee beans. Maybe then I won't scare my sister off. She normally loves coffee ice cream, but my version made with a very bold bean was actually more than she could handle as someone who doesn't drink her coffee black. I'll try not to make my flavors all about me in the future. :)


Coffee Ice Cream
Recipe by David Lebovitz in The Perfect Scoop
Makes about 1 quart

1 1/2 cups whole milk
3/4 cup sugar
1 1/2 cups whole coffee beans
Pinch of salt
1 1/2 cups heavy cream
5 large egg yolks
1/4 teaspoon vanilla extract
1/4 teaspoon finely ground coffee

Warm the milk, sugar, whole coffee beans, salt, and 1/2 cup of the cream in a medium saucepan. Once the mixture is warm, cover, remove from the heat, and let steep at room temperature for 1 hour.

Rewarm the coffee-infused milk mixture. Pour the remaining 1 cup cream into a large bowl and set a mesh strainer on top. In a separate medium bowl, whisk together the egg yolks. Slowly pour the warm coffee mixture into the egg yolks, whisking constantly, then scrape the warmed egg yolks back into the saucepan.

Stir the mixture constantly over medium heat with a heatproof spatula, scraping the bottom as you stir, until the mixture thickens and coats the spatula. Pour the custard through the strainer and stir it into the cream. Press on the coffee beans in the strainer to extract as much of the coffee flavor as possible, then discard the beans. Mix in the vanilla and the finely ground coffee and stir until cool over an ice bath.

Chill the mixture thoroughly in the refrigerator, then freeze it in your ice cream maker according to the manufacturer's instructions.


Step-by-Step in Pictures

Warm the milk, sugar, beans, salt and half cup of the cream...

Cover, remove from heat, and let steep for 1 hour...

In a bowl, whisk together the egg yolks and then add the warmed coffee-infused milk...

Pour the egg-coffee-milk mixture back into the saucepan and stir constantly over medium heat till mixture thickens...

Pour the custard through a strainer and into a bowl containing the remaining 1 cup of cream...

After discarding the beans, add the vanilla and finely ground coffee and stir over an ice bath...
The ice cream mixture is ready to go in the fridge (I insist on chilling it overnight)...

Take the mixture out of the fridge and pour into your ice cream maker...

When it's done churning, it will look like this yummy soft serve ice cream...

Serve soft or freeze until hard...

Scoop and enjoy!

Friday, April 10, 2009

How to Have a Turkey Sandwich on Passover: Passover Rolls


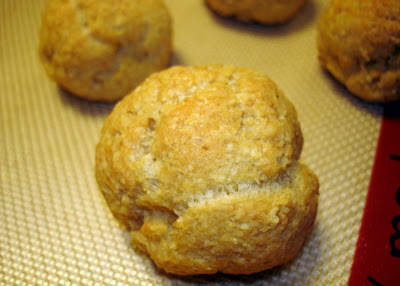
I'm giving you the secret to my semi-normal life during Passover. If you can have a turkey sandwich on this quite food-restricting holiday, you know it can't be too bad. And with this roll recipe, it's all possible!

There are actually a lot of different Passover roll recipes out there, and I chose this one because it had half the number of eggs as most of them. I also saw some versions that called for a tablespoon or so of sugar. The one below works just fine for me.

Because I shape my rolls pretty small, I might make myself two or three mini turkey sandwiches for one meal, and they're perfect to bring to work. You could also make Swiss cheese, tomato, and lettuce sandwiches, or even snack on the rolls plain. They're my brother Zachary's absolute favorite Passover food item. Consider this secret of mine, well, not so secret anymore!


Passover Rolls
Recipe by Judy Zeidler in The Gourmet Jewish Cook

2 cups matzo meal
1 teaspoon salt
1 cup water
1/2 cup vegetable oil
4 eggs

In a bowl, combine the matzo meal and salt and set aside.

In a medium saucepan, bring the water and oil to a boil. Pour in the matzo meal mixture and stir until blended. Transfer to a large bowl of an electric mixer. One at a time, add the eggs, beating well after each addition until completely blended. Let rest for 10 minutes.

Preheat the oven to 375 degrees.

With well-oiled hands, shape the dough into 3-inch balls or ovals and place 2 inches apart on a well-greased baking sheet. Bake for 40 to 50 minutes, or until golden brown. Transfer to racks and cool. Split and fill with your favorite mixture.


Step-by-Step in Pictures

Make the dough and let rest for 10 minutes before shaping into balls...

Shape the dough into balls and space evenly apart on the cookie sheet...
Bake for 40-50 minutes in a 375 degree F oven...
Cross-section...
Turkey Sandwich on Passover! Yes We Can!

Thursday, April 9, 2009

The Ultimate Passover Snack: Caramel Matzoh Crunch


I'm starting to wonder if all of the Passover-keeping people out there have tried this sweet snack at one point or another. It is SO enormously popular. The recipe has been floating around the Internet for years and wherever it goes, it gets rave reviews. It's hardly original for me to post it to Happy Go Marni, but on the other hand, I feel so left out! Plus, it's something my mom and I both make every year.

It's great to munch on in small doses when you need to kill that chocolate craving, and it makes a fun hospitality gift if you wrap it cutely in a tin and hand it to the person hosting your seder.


The best way to think of this is as a cross between chocolate bark, peanut brittle, and toffee. It taste everything like toffee, but it sort of resembles bark and brittle in appearance. It doesn't take long to make, its homemade caramel will knock your socks off, and it goes really far. One recipe will last you the entire week of Passover...that is, unless you're gift-giving or have zero willpower, which is actually entirely possible, even probable.

What else is fun about it is that you can change it up, sprinkling chopped nuts, marshmallows, or other Kosher-for-Passover candies on top, or using white and dark chocolate and marbleizing the two for a cool visual effect. The possibilities are endless. You could even add a flavoring to the caramel, like vanilla, or a liqueur. This Caramel Matzoh Crunch is honestly so good you will find yourself wanting matzoh at other times throughout the year, and let's face it, it's not normal to have a craving for matzoh in November.


Caramel Matzoh Crunch
Recipe by Marcy Goldman in A Treasury of Jewish Holiday Baking

4-6 unsalted matzohs
1 cup (2 sticks) unsalted butter or unsalted Passover margarine
1 cup firmly packed brown sugar
3/4 cup coarsely chopped chocolate chips or semi-sweet chocolate

Preheat the oven to 375°F. Line a large (or two smaller) cookie sheet completely with foil. Cover the bottom of the sheet with baking parchment — on top of the foil. This is very important since the mixture becomes sticky during baking.

Line the bottom of the cookie sheet evenly with the matzohs, cutting extra pieces, as required, to fit any spaces.

In a 3-quart, heavy-bottomed saucepan, combine the butter or margarine and the brown sugar. Cook over medium heat, stirring constantly, until the mixture comes to a boil (about 2 to 4 minutes). Boil for 3 minutes, stirring constantly. Remove from the heat and pour over the matzoh, covering completely.

Place the baking sheet in the oven and immediately reduce the heat to 350°. Bake for 15 minutes, checking every few minutes to make sure the mixture is not burning (if it seems to be browning too quickly, remove the pan from the oven, lower the heat to 325°, and replace the pan).

Remove from the oven and sprinkle immediately with the chopped chocolate or chips. Let stand for 5 minutes, then spread the melted chocolate over the matzoh. Chill, still in the pan, in the freezer until set. Break into squares or odd shapes.

This makes a good gift.

Variation:
You can also use coarsely chopped white chocolate (or a combination of white and dark), and chopped or slivered toasted almonds (sprinkled on top as the chocolate sets). You can also omit the chocolate for a caramel-alone buttercrunch.


Step-by-Step in Pictures

Line the pan with foil and then parchment paper...

Cover the bottom of the pan with sheets of matzoh...
Bring the brown sugar and butter/margarine to a boil...
Here's your caramel layer...
Immediately (because it will harden quickly) pour the hot caramel layer over the matzoh sheets, then bake for about 15 minutes. When done, sprinkle chocolate chips over the hot caramel-covered matzoh...
Don't return the pan to the oven; just let the chocolate chips sit for 5 minutes to become spreadable, then spread evenly over the caramel layer...
I recommend putting the tray in the fridge for a few minutes to set the chocolate...
Then break up the matzoh into irregular snack-sized shapes...

Notice the double layer? Caramel, then chocolate? Why not try marshmallows or nuts next time?
Yum!

Wednesday, April 1, 2009

Winners Announced for the 2009 L.A. Cupcake Challenge

The baker behind Sugar Jones holding up her Award-Winning Blackberries and Cream Cupcake.

Let's put a stop to the anticipation. In case you've been checking back to see who won the 2009 L.A. Cupcake Challenge on Sunday, the results are finally in. There were two categories - Traditional (you know, your red velvets, chocolates, vanillas, etc...) and Original (the more exotic, creative, unexpected flavors). An Overall Winner was also selected.

So without further ado...

Best Traditional
1st: Susie Cakes: Red Velvet
2nd: Two Parts Sugar: Raspberry Red Velvet
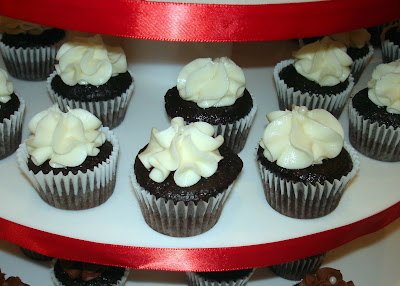
3rd: Blue Cupcake: Chocolate

Best Original
1st: Polkatots: Dulce De Leche
2nd: Sugar Jones: Blackberries and Cream
3rd: Southern Girl: Sweet Potato Pie

Best Overall
1st: Polkatots: Dulce De Leche
2nd: Sugar Jones: Blackberries and Cream
3rd: Sugar Jones: Casanova's Kiss

As you can see, Sugar Jones impressively won 2nd place for her original Blackberries and Cream cupcake, and then took home 2nd and 3rd place overall! I'm very excited to see Blue Cupcake made it to 3rd place in Best Traditional because I thought the quality of her cupcake to be outstanding and I was hoping the rest of the voters felt the same way. Polkatots's Dulce De Leche was certainly the talk of the room on Sunday; so many people came up to me and asked if I had tried that one yet because it was going to be a surefire winner. Those are some smart tasters, predicting the future like that! Southern Girl's Sweet Potato Pie was another I enjoyed, and there was nothing at all similar to it of the dozens of cupcake flavors submitted to the Challenge.

Southern Girl's Award-Winning Sweet Potato Pie

I am sad not to see a couple of my personal favorites on these winner lists, such as the Pineapple-Upside-Down cupcake from Susie Cakes or Buttercake Bakery's Chocolate, but I'm also not shocked and appalled by any of the winners, and I admit there were definitely a few cupcakes entered on Sunday that did not do anything for me and frankly, would have offended me and my taste buds if they had won.

Blue Cupcake's Award-Winning Chocolate

Congratulations to all the winners! Heck, congratulations to all who entered at all. I can't even imagine making HUNDREDS of identical cupcakes, keeping both flavor and presentation consistent, then lugging them in a vehicle to the event, setting up a display, and maintaining a smile as people (including myself) piggied their way from booth to booth. A lot was asked of you bakers, and I don't take any of it for granted!

So when is the 2010 L.A. Cupcake Challenge? :-)

Monday, March 30, 2009

2009 L.A. Cupcake Challenge Leaves a Pleasing Aftertaste

Delilah Bakery

The much hyped 2009 L.A. Cupcake Challenge sponsored by Nesquik happened yesterday and in two words: 5 stars. I had so much fun. And not just because I brought a whole posse with me. My mom flew in for the weekend, my sister and her fiance attended, my first cousin and her boyfriend, and a bunch of friends and coworkers.

Part of the ballot

My coworker's shoe

It took place at the Renaissance Hollywood Hotel in Hollywood, a perfect venue for the occasion. There was plenty of space to roam and sit and the cupcake booths lined the perimeter of the ballroom. The Nesquik bunny was there, posing for photos and handing out regular and mini sized versions of Chocolate and Strawberry Milk. A photobooth was stationed at one corner of the room allowing for unlimited corny photos with friends to be taken.

My sister Beth and me with the Nesquik Bunny

Flavor Feelings

I attended last year's Cupcake Challenge and learned a few things to make this year's experience more enjoyable (which seems hard to do when last year's was awesome). Namely, I learned not to eat whole cupcakes if I wanted to make it through all 37 flavors. And as a judge this year, I felt it my responsibility to try every single cupcake if my vote was going to be fair. Slow and steady wins the race. I was there the entire 3 hours in order to eat so many sweets. But I did it.

And on top of that, I broke my own rule: I fell in love with two cupcakes and ate the entire darned things, not sparing the tiniest crumb. The first time that happened, it was for Susie Cakes' Pineapple Upside Down Cake, and the second time, it was for Buttercake Bakery's Chocolate.

Susie Cakes Pineapple Upside Down - out of this world!

Buttercake Bakery Chocolate - again, out of this world!

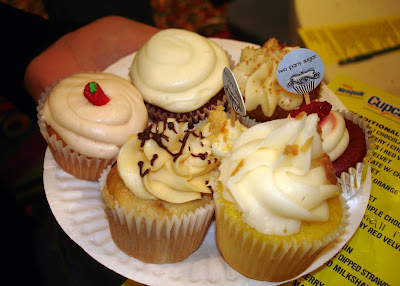
While those were the only two cupcakes I gobbled up completely, there were plenty of others that caught my attention...The Lavender cupcake from Melli Belli was wonderfully moist and full of lavender flavor. The Coconut cupcake from Blue Cupcake made me want to order a full-sized 9 or 10-inch round layer cake for my next party. And the Chocolate Dipped Strawberry from Charmed Cupcakes had a perfect crumb, a strong chocolate flavor, and yummy pieces of strawberry in the cake, not to mention an attractive presentation with star-shaped chocolate candies stuck into the frosting. Miss Priss Cupcakes had an excellent banana chocolate chip cupcake named Monkey Bites and was, in my opinion, one of the prettiest ones to look at. Oinkster/Boho's Chocolate Bread Pudding was certainly memorable, though denser than I'm used to for a cupcake. As for booth decor, I was really impressed with Delilah Bakery's outdoor garden motif. All in all, it was an amazing afternoon of cupcake overload.

Melli Belli Lavender and Gingerbread cupcakes

Blue Cupcake Coconut and Chocolate cupcakes

Blue Cupcake Coconut cupcake display

Sugar Jones Blackberries & Cream

Miss Priss Cupcakes Monkey Bites

Two Parts Sugar Raspberry Red Velvet

Hotcakes Bakes Strawberry Cupcakes

Oinkster/Boho Chocolate Bread Pudding

Charmed Cupcakes Chocolate Dipped Strawberry and Red Velvet

Another important lesson I learned from last year is that bringing Tupperware is a VERY good idea. Many of the booths had leftover cupcakes at the end of the event and were happy to fill your boxes and bags if you had them. Plus, it's such a shame to throw out half of a wonderful cupcake simply because you can't eat 37 full cupcakes in one sitting. So Wise Marni brought a container this year and saved halfsies and a few more wholes for the road. I'll need a week to recover from the sugar coma, but then I'm sure I'll be able to dig right in.

Someone's makeshift "Tupperware" filled with whole cupcakes

Hats off to another successful Cupcake Challenge. It was well organized and the quality and range of bakeries was impressive. It's no wonder the place was packed, tickets were sold out, and blogs and news organizations spotlighted the event.

One of many trips to the booths

Judge's Wardrobe

In my last blog post, I asked you if it would be ok for me to wear the same shirt as I wore last year. The shirt read, "Make Cupcakes Not War." Many of you said it would be just fine and I was all set to wear it again, but with some time to spare hours before the Cupcake Challenge, I decided to return to Johnny Cupcakes on Melrose in West Hollywood and find myself a new wardrobe.

First of all, I decided on a really fun one - no words this time, just an image of stemmed flowers but with cupcakes as blossoms. I'm glad I decided to change shirts; I spotted a handful of people at the event with my last year's shirt.

Also, I can't get over how FUN this t-shirt store is! The place is decorated like a bakery, even though there's nothing edible inside. Glass display cases show off t-shirts, and retro ovens line the walls and randomly open so fake steam can blow out. You have got to visit their store sometime, and at the very least, visit their cool website designed to be an oven. I'm hooked on Johnny Cupcakes and will probably end up there again for a 2010 L.A. Cupcake Challenge costume change. :-)

Johnny Cupcakes store on Melrose in West Hollywood

Retro ovens on the wall at Johnny Cupcakes open randomly and let fake steam out!

**Note: Because votes could be submitted up until the very end of the event, winners were not announced at the event. They will be tallied and announced soon, but you're going to have to wait!

**Update: Winners have been announced! See my next blog post.
Related Posts with Thumbnails