Saturday, November 29, 2008

Dutch Apple Bars


A funny thing happened when I chose this bar. My mom had pulled out a bunch of cookbooks from her collection before I arrived to town for Thanksgiving, and as soon as I sat down in her kitchen, she invited me to browse the lot. After studying every page of every one of those books, I told her there was one recipe I wanted to make: these Dutch Apple Bars. She says to me, "No way! That is the one recipe of all these books I had picked out, too!" And this is Reason #5,304 that we are mother and daughter. Or should I say, the (Dutch) apple doesn't fall far from the tree.

Also worth noting, when I served this Dutch Apple Bar to my grandfather, he remarked, "On a scale of 1 to 10, this bar is an 11!" And then he gobbled up 2 and took more home.


Dutch Apple Bars
Recipe from Gold Medal Fall Baking No. 27
Makes 16 bars

1 cup all-purpose flour
1/3 cup sugar
1/2 cup butter or margarine
1/3 cup sugar
2 tablespoons all-purpose flour
1/2 teaspoon ground cinnamon
1 1/2 cups thinly sliced peeled tart cooking apples

Crumb Topping (below)

1. Heat oven to 350 degrees F. Mix 1 cup flour and 1/3 cup sugar in medium bowl. Cut in butter, using pastry blender or crisscrossing 2 knives, until crumbly. Press in ungreased square pan, 9x9x2 inches. Bake 25 minutes.

2. Mix 1/3 cup sugar, 2 tablespoons flour and the cinnamon in medium bowl. Stir in apples to coat. Spoon over baked layer. Sprinkle with Crumb Topping.

3. Bake 35 to 40 minutes or until topping is light brown and apples are tender. Cool completely. For bars, cut into 4 rows by 4 rows.

Crumb Topping
2/3 cup all-purpose flour
1/2 cup packed brown sugar
1/4 cup butter or margarine

Mix all ingredients until crumbly.


Step-by-Step in Pictures

Prepare the crust...

Press the crust dough into the pan and bake it...
Make the apple mixture...

Spread the apple mixture on the baked crust...
Make the Crumb Topping...
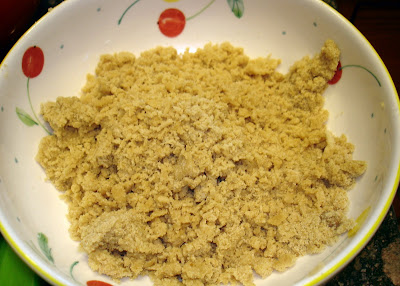
Sprinkle the Crumb Topping on the apple mixture...
Bake the bars...

The entire house will smell amazing!

Monday, November 24, 2008

Turducken, The Bird Within a Bird Within a Bird


How did I not know about this famous, albeit absurd, concoction before today? Turducken is the result of stuffing a chicken inside a duck and stuffing that stuffed duck inside a turkey. It's a bird within a bird within a bird and I love the concept! My coworker and I were talking about it and he's not nearly as comfortable with the idea - something about it seeming too cannibalistic. His loss. :)

If you want to take this basic idea and go a few steps further, try outdoing the alleged (Wikipedia-fied) current record of 17 nested birds. That one features a bustard (I think I need a bird dictionary) stuffed with a turkey, a goose, a pheasant, a chicken, a duck, a guinea fowl, a teal, a woodcock, a partridge, a plover, a lapwing, a quail, a thrush, a lark, an Ortolan Bunting, and a Garden Warbler.

For some reason, though, I don't think 17 is the number to beat. I have a feeling it's at least 21.

Or stick to the common Turducken of 3 birds and wrap the whole thing in bacon as featured in (yes, this news site does exist) Bacon Today.


And if you're vegetarian, stick with Tofurky. Sounds enough like Turducken so you don't feel left out.

Sunday, November 16, 2008

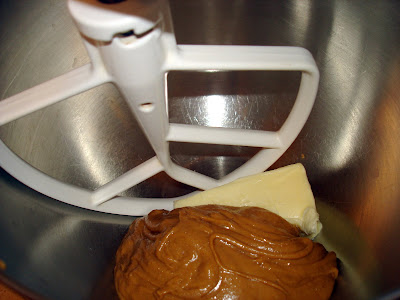
The Rachel Bar, a.k.a. Peanut Butter Ganache Bars

The Rachel Bar

This post is dedicated to my friend Rachel. Just weeks ago she was diagnosed with Stage 4 Hodgkin Lymphoma and started chemo almost immediately. She has many months of chemo left but she is a trooper! She continues to have such a positive outlook with the help of many supportive friends and family. Rachel's optimism should be shared with other cancer patients, and it's certainly an inspiration to me.

The Rachel Bar is named for the girl in the middle

I have been looking for days for a recipe that I could rename after her, but it wasn't until this morning that I found something that truly screamed Rachel. Peanut Butter Ganache Bars are the thing I've been looking for. And from this moment on, let's just refer to them as The Rachel Bar.

One final note: In Rachel's honor, I will be running (well, more accurately jogging, walking, and panting) in the Carlsbad Half-Marathon on January 25 as part of Team Rachey. My friend Avi created a fundraising page so we can all contribute to the Leukemia & Lymphoma Society in Rachel's name. If you have $5 (or more, of course!), it would mean so much if you added to the fund and gave Rachel an even more gigantic support network.

I hope you enjoy The Rachel Bar. It was selected and named with love to Rachel.


The Rachel Bar
(a.k.a. Peanut Butter Ganache Bars)
Recipe by Susan Spungen in the cookbook Green & Black's Chocolate Recipes
Makes 32 bars

For the cookie layer:
1 1/4 cups all-purpose flour
1/2 teaspoon baking soda
1/4 teaspoon salt (preferably flaky sea salt, pulverized)
1/2 cup (1 stick) unsalted butter
1 cup natural peanut butter (smooth)
1/2 teaspoon pure vanilla extract
1/2 cup firmly packed dark brown sugar
1/2 cup granulated sugar
1 large egg
3/4 cup Rice Krispies

For the ganache layer:
One 5.2-ounce bar dark chocolate, minimum 70% cocoa content, coarsely chopped
8 ounces sour cream
2 tablespoons unsalted butter, at room temperature, diced
1/4 cup light corn syrup
1/2 teaspoon vanilla extract

Preheat oven to 325 degrees F.

In a bowl, sieve together flour, baking soda, and salt.

In an electric mixer fitted with the paddle attachment, cream the butter and the peanut butter until well combined. Add the vanilla and sugars. Mix well and scrape the sides with a rubber spatula. Add half the dry mixture and mix until just incorporated. Add the egg and mix well. Add the remaining dry mixture and Rice Krispies and mix until dough just comes together.

Press into the base of a non-stick 9x13 inch baking pan. Bake for 20-23 minutes, until barely golden on top, rotating halfway through. Remove from the oven and let cool completely on a wire rack.

Meanwhile, make the ganache. Melt the chocolate in a heatproof bowl set over a saucepan of simmering water. Stir occasionally until smooth. Remove the bowl from the pan, set aside and let cool slightly. Meanwhile, warm the sour cream, in its container with the lid removed, in the microwave or in a bowl of warm water, until just warm.

Stir the butter into the chocolate, then the sour cream, corn syrup, and vanilla, until well combined. It should be silky smooth. Let cool, stirring occasionally, until firm enough to spread. When the cookie is completely cool, spread the ganache evenly over the entire surface in soft swirls or stripes. Set aside to allow the ganache to firm, cut into 32 rectangles and serve.


Step-by-Step in Pictures

Thursday, November 13, 2008

The Hamburger Dress

This morning my friend showed me the website of an incredibly talented artist named Joy Kampia O'Shell. She crochets clothes designed to look like food. Actually, she can crochet anything, as her site reveals, but what really caught my eye were the dresses.

Hamburger Dress


Sundae Dress

I want one! But that sundae dress is $900. I can see why, too. It's one-of-a-kind, gorgeous, and probably took forever to crochet. Oh and men, don't even bother trying to lick the whipped cream off.

Sunday, November 9, 2008

Banana Chocolate Chip Ice Cream


I came home from work and noticed very ripe bananas on my countertop. Until recently, I, like most people, would think of two options for these bananas: banana bread or the trash. Certainly I'm not crazy enough to eat the mushy things raw or in cereal! Ok, I'll admit that since I'm a baker, I have plenty of ideas for ripe bananas, but banana bread is still the first one that comes to mind.

Here's the thing, though. Ever since I started making ice cream, I've been looking at ingredients around my kitchen differently. Now I look at ripe bananas and have three likely, no-brainer options. Banana ice cream would be a cinch to make, and why should banana bread get all the glory?

And armed with that, I have just officially one-upped my two-option friends. Neener neener.


Banana Chocolate Chip Ice Cream
Recipe by Emily Luchetti in A Passion for Ice Cream (well actually, I added the chocolate chips to her Banana Ice Cream recipe)

2 bananas
3 large egg yolks
6 tablespoons sugar
1/8 teaspoon kosher salt
3/4 cup milk
1 1/4 cups heavy (whipping) cream
6-8 ounces mini chocolate chips

Preheat the oven to 350 degrees F. Put the unpeeled bananas on a baking sheet. Bake for 10 to 15 minutes, until soft and beginning to give off some liquid. Let cool. Remove the skins from the bananas. Puree the bananas in a food processor.

In a bowl, whisk together the egg yolks, 3 tablespoons of the sugar, and the salt. Combine the milk, cream, and remaining 3 tablespoons sugar in a heavy saucepan. Cook over medium heat, stirring occasionally, until almost simmering. Slowly pour the milk and cream into the eggs, whisking as you pour. Return the milk mixture to the saucepan. Cook over medium-low heat, stirring constantly with a heat-resistant plastic or wooden spatula, until the custard reaches 175 degrees F and lightly coats the spatula.

Strain the custard into a clean bowl and cool over an ice bath until room temperature. Stir the banana puree into the custard. Cover and refrigerate the custard for at least 4 hours or up to overnight. Churn in an ice cream machine according to the manufacturer's instructions. When the ice cream is almost done, add the chocolate chips and churn for about 3 minutes or until incorporated. Freeze until scoopable, about 4 hours, depending on your freezer.

Step-by-Step in Pictures

Place ripe bananas on baking sheet...

Bake them until liquid oozes out of them...
Let the bananas cool in their peel, and then remove the peel...

Puree the bananas...
Meanwhile, prepare the custard mixture and strain over an ice bath...

Add the banana puree, stir well, and then chill in fridge overnight...

Churn into ice cream and add the chocolate chips about 3 minutes before finishing...
Homemade banana chocolate chip ice cream!

Voila!

Sunday, November 2, 2008

Mint Brownies


With Halloween over, all the candy is on sale at the drug stores. So now's the time to make baked goods that call for candy. These mint brownies use both York Peppermint Patties and Andes Mints. Truth be told, I've been in the mood to make mint brownies for awhile now, and the recipe I had selected didn't have candy in it, but peppermint extract instead. And for some reason, I was under the impression I already owned peppermint extract. I was wrong. :(

So I looked for other mint brownie recipes that could get around the lack of extract and still taste minty. The solution was to use mint-flavored candy. But next time I go to Trader Joe's, I'll pick up the peppermint extract. My pantry feels a little less than well-stocked in the meantime.


Mint Brownies
Recipe is actually a combination of two recipes: one from my cousin Rachael and the other from a Bars & Brownies recipe booklet by Better Homes and Gardens
Makes 16 to 20 brownies

Brownies

1/2 cup butter
2 oz. unsweetened chocolate, cut up
1 cup granulated sugar
2 eggs
1/4 tsp. mint extract or vanilla extract
2/3 cup all-purpose flour

18 York Peppermint Patties (an 11.4 oz. bag should work perfectly)

Green Frosting
1/4 cup butter
1 1/2 cups sifted powdered sugar
2 tablespoons green creme de menthe OR 2 tablespoons heavy cream (can use milk instead) and 2 drops green food coloring

Decoration
7 Andes Mints or other Layered chocolate-mint candies, chopped
1 oz. semisweet chocolate, melted

Preheat oven to 375 degrees F. Grease 9x9x2-inch baking pan; set aside.

In medium heavy saucepan, stir 1/2 cup butter and unsweetened chocolate over low heat just until melted. Remove from heat. Stir in granulated sugar, eggs, and mint or vanilla extract. Using wooden spoon, lightly beat just until combined. Stir in flour.

Spread batter in prepared pan. Bake for 18-20 minutes. Immediately after baking, place the peppermint patties on brownies. Return to oven 3 to 4 minutes or until patties are softened. Spread evenly over brownies with an offset spatula; cool completely. Frost with the Green Frosting.

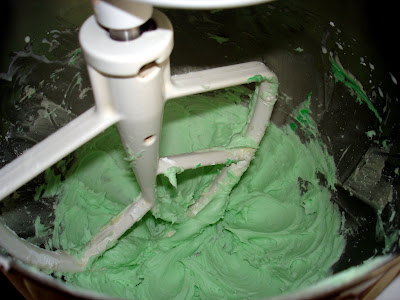
To make the Green Frosting: In medium mixing bowl, beat 1/4 cup butter with electric mixer on low to medium speed until fluffy. Gradually add 1 cup of the powdered sugar. Beat in creme de menthe or milk and food coloring. Gradually beat in remaining powdered sugar to make frosting of spreading consistency.

To decorate the brownies: Press the chopped Andes mints into the green frosting and drizzle the melted semisweet chocolate on top.

Cut brownies into triangles or bars.

Step-by-Step in Pictures


Friday, October 31, 2008

Pumpkin Ice Cream


Happy Halloween!!
I've gone a little insane the past week. I decided making ice cream would be my new form of relaxation. I knew it was going to be a learning process because while I've used my ice cream maker before, it was only for sorbet or vanilla ice cream. I had never attempted a more exotic flavor nor had I ever applied the custard method. I was up to the challenge since I was well-equipped with two expert ice cream cookbooks (David Lebovitz and Emily Luchetti) not to mention a mother who's already ventured beyond plain vanilla and made some incredible ice creams lately.


The schedule this week went something like the following:
Day 1: Come home from work. Make mixture of first batch of ice cream. Put in fridge to chill overnight.
Day 2: Come home from work. Churn batch number 1. Make mixture of batch number 2. Put batch number 2 in fridge to chill overnight.
Day 3: Come home from work. Churn batch number 2. Make mixture of batch number 3. Put batch number 3 in fridge to chill overnight. Make homemade hot fudge.
Day 4: Come home from work. Churn batch number 3. Have an ice cream party and eat 3 delicious homemade flavors smothered in hot fudge.

I am happy to report that I have mastered the custard method, which I needed for two of the three recipes. Yippee! I'm less happy to report that I'm pretty much out of room in my freezer to make more ice cream. But that's nothing a few more ice cream parties can't fix.

In honor of Halloween, one of my batches is pumpkin ice cream. And it tastes just like pumpkin pie!


Pumpkin Ice Cream
Recipe by Emily Luchetti in A Passion for Ice Cream

3 large egg yolks
1/2 cup sugar
1/8 teaspoon kosher salt
3/4 cup milk
1 1/2 cups heavy (whipping) cream
1/2 teaspoon ground cinnamon
1/2 teaspoon ground ginger
3/4 cup pumpkin puree

In a large bowl, whisk together the egg yolks, 1/4 cup of the sugar, and the salt.

Cook the milk, cream, the remaining 1/4 cup sugar, the cinnamon, and ginger in a saucepan over medium-high heat, stirring occasionally, until almost simmering. Slowly whisk the liquid into the egg mixture. Return the milk mixture to the pan and cook over low heat, stirring constantly with a heat-resistant plastic or wooden spatula, until the custard reaches 175 degrees F and lightly coats the spatula. Strain through a medium-mesh sieve. Cool over an ice bath until room temperature. Stir in the pumpkin puree. Refrigerate for at least 4 hours or up to overnight.

Churn in an ice cream machine according to manufacturer's instructions. Place the ice cream in the freezer.


Step-by-Step in Pictures

Combine egg yolks, sugar, and salt.


Make the milk mixture, add to the egg mixture, then put all of it back in the saucepan and heat to 175 degrees F.

Strain the mixture over an ice bath.

Let cool to room temperature.

Then stir in the pumpkin.

Put the mixture in the fridge to chill overnight. Then churn in the ice cream maker.

Scoop into a container and store in the freezer.
Related Posts with Thumbnails