Thursday, September 17, 2009

No-Knead Round Challah, Perfect for Rosh Hashanah


Shana Tova! Happy New Year to my fellow members of the tribe! Rosh Hashanah is here!

I love this Jewish holiday. It's such a joyous celebration spent with family, focusing on new beginnings, a clean slate, second chances, basically, a new year! And the food is fantastic! Besides making everything with apples and honey (I'm not kidding, you can throw those two ingredients into just about anything: pasta, meatloaf, chicken, kugel, salad, cookies, etc...), another tradition is to make a round challah, symbolizing the cycle of a year or the cycle of life (and oh man, there are so many other interpretations!). When I saw this King Arthur Flour no-knead round challah recipe featured in the blog Bakers' Banter and the accompanying gorgeous photos, I had to try it.


The concept of a no-knead challah is interesting, and it's becoming increasingly popular and trendy. I had never tried it before. This specific challah recipe is actually ideal for a busy, working person who can't put together a traditional loaf of bread in the evening after work unless she wants to be up till 1 in the morning. Kneading, plus two rising times, plus baking, means one really late night. But with this recipe, you make the dough, let it rise for about 2 hours, and then it goes into the fridge overnight! You take it out the following night, shape it, let it rise another 90 minutes, and then bake it! A two day process works perfectly for my busy schedule!

As you'll see in my photos, the challah grew A LOT during the rises and baking! More than in the photos from Bakers' Banter. Maybe I have superhero super active yeast. Still, without comparing it to anything, it's a gorgeous, regal loaf. And I'm patting myself on the back for successfully making a yeast bread without kneading it at all. The urge was there but I resisted!


No-Knead Challah
Recipe from King Arthur Flour

Dough
6 3/4 cups or 7 3/4 cups King Arthur Unbleached All-Purpose Flour*
1 tablespoon + 1/2 teaspoon salt
1 1/2 tablespoons instant yeast
1 1/2 cups lukewarm water
4 large eggs
1/2 cup honey
1/2 cup melted butter or vegetable oil
*See step #1, below.

Topping
1 egg (any size) beaten with 1 tablespoon cold water
2 to 3 tablespoons sesame seeds or poppy seeds, optional

1. The flour/liquid ratio is important in this recipe. If you measure flour by sprinkling it into your measuring cup, then gently sweeping off the excess, use 7 3/4 cups. If you measure flour by dipping your cup into the canister, then sweeping off the excess, use 6 3/4 cups. Most accurate of all, and guaranteed to give you the best results, if you measure flour by weight, use 33 ounces.

2. To make the dough: Combine all of the dough ingredients, in the order written, in a very large bowl (at least 6 quarts). Stir to make a sticky dough. You can do this in a stand mixer and then transfer to a larger bowl; or simply use a big bowl and spoon (or dough whisk).

3. Cover the bowl, and let the dough rise for 2 hours at cool room temperature.

4. Refrigerate the dough for at least several hours, to chill it and make it easier to work with. It can be refrigerated for up to 4 days before using.

5. When you're ready to make challah, remove the dough from the refrigerator, and scoop out about one-third of the dough (about 21 ounces). Transfer it to a floured work surface; a silicone mat works well here.

6. Divide the dough into three pieces, and shape each piece into a log about 24" long.

7. Braid the logs, pinching the strands together at each end.

8. Lightly grease an 8" x 2" round cake pan. It's important that the pan is at least 2" deep. If it's not use, a 9" round pan. Coil the braid into the pan.

9. Cover the pan, and allow the braid to rise for about 90 minutes, till it's quite puffy. Towards the end of the rising time, preheat the oven to 350°F.

10. Uncover the challah, and brush it with the egg/water mixture. Sprinkle with seeds, if desired.

11. Bake the challah for 30 to 35 minutes, till it's golden brown and an instant-read thermometer inserted into the center registers at least 190°F.

12. Remove from the oven, and carefully turn out of the pan onto a rack to cool.

Yield: one 9" round braid. The entire recipe will make 3 loaves.


Step-by-Step in Pictures

Combine all ingredients for the dough into a mixing bowl...

Mix until a sticky mass forms...

Place in a bowl, cover, and let rise about 2 hours...

Here's the dough after 2 hours of rising...

Then place in the fridge overnight...

Next night, take the dough out of the fridge and divide into 3 portions...

Roll out each of the braid strands to 24 inches long...

To braid, I start from the center and work out from both ends. This ensures the braid will be evenly-thick, rather than thick at one end and tapered at the other.

There's nice even braiding...

Transfer the braid to a well-greased round pan...

Cover and let rise until puffy, about 90 minutes...

Just before baking, add the egg wash and sesame or poppy seeds...

Bake for at least 35 minutes...

Gorgeous loaf hot out of the oven!

Wednesday, September 9, 2009

Peanut Butter Chocolate Chip Bars


I'm a big time fan of a blog called The Chocolate Peanut Butter Gallery. It is anything and everything devoted to that amazing combo. My favorite ice cream flavor at Baskin Robbins is Peanut Butter 'n Chocolate. My favorite candy from Charles Chocolates is the Peanut Butterfly (chocolate enrobing a peanut butter filling). Reese's Peanut Butter Cups were always my favorite Halloween candy as a child. When I go to Crumbs Bake Shop in Beverly Hills, the only cupcake I ever order is the Peanut Butter Cup. I hold a very special place in my heart for chocolate combined with peanut butter. And more to the point, I have a major weakness for it.

These Peanut Butter Chocolate Chip Bars come from a Chocolatier Magazine cookbook. Say no more! They are chewy and gooey and peanutbuttery and exactly what I, as a chocolate peanut butter worshiper, am looking for. If you belong to that camp, too, then indulge yourself and make these. They are incredibly easy to prepare and use basic ingredients you're bound to have handy.

Sure, the saying goes, "Everything in moderation." It's a good rule to live by, so fine, I don't plan to die from a chocolate peanut butter overdose. But a temporary food coma works for me.


Peanut Butter Chocolate Chip Bars
Recipe by Mary Goodbody and the editors of Chocolatier Magazine in Glorious Chocolate

1 1/3 cups all-purpose flour
1 teaspoon double-acting baking powder
1/4 teaspoon baking soda
1/4 teaspoon salt
2/3 cup extra-chunky peanut butter
4 tablespoons (1/2 stick) unsalted butter, softened
1 cup packed light brown sugar
2 large eggs, at room temperature
1 teaspoon vanilla extract
6 ounces (about 1 cup) semisweet chocolate chips

1. Position a rack in the center of the oven and preheat to 350 degrees F. Line a 9-inch square baking pan with aluminum foil so that the foil extends 2 inches beyond two opposite sides of the pan. Lightly butter the bottom and sides of the foil-lined pan.

2. In a small bowl, stir together the flour, baking powder, baking soda, and salt.

3. In a large bowl, using a hand-held electric mixer set at medium-high speed, beat the peanut butter, butter, and brown sugar for 2 to 3 minutes or until well combined. Beat in the eggs and vanilla. Using a wooden spoon, stir in the flour mixture until just combined. Sir in the chocolate chips. Scrape the batter into the prepared pan and spread evenly.

4. Bake for 25 to 30 minutes or until a cake tester or toothpick inserted into the center of the pan comes out with a few moist crumbs clinging to it. Do not overbake the brownies. Cool in the pan on a wire rack for 30 minutes. Using the two ends of the foil as handles, lift the bars out of the pan. Leaving the bars on the foil, cool on the wire rack for at least 2 hours. Invert the bars onto a plate and carefully peel off the foil. Invert again onto a smooth surface and cut into 12 bars. Store the bars in an airtight container.

Yield: 12 bars.


Step-by-Step in Pictures

Combine dry ingredients in a bowl...

In a mixing bowl, cream the peanut butter, butter, and brown sugar together...

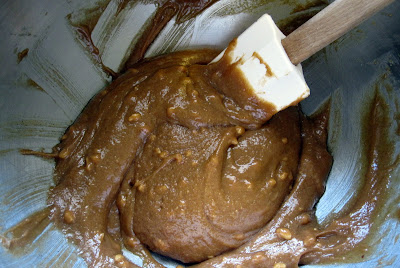
It will look like this delicious batter (which tastes amazing but I promise it's worth continuing on with the recipe!)...

Add the eggs and vanilla...

Now the batter is becoming more goopy and ribbony...

Fold in the dry ingredients (do not overmix)...

The batter will become thick...

Stir in the chocolate chips...

Spread the batter into a greased, foil-lined pan...

Bake at 350 degrees F for about 25 minutes (my speedy gonzalez oven required only 22 minutes)

And here you go!

Full of peanut butter flavor! And the chocolate chips stay soft and melty!

Monday, August 31, 2009

Chocolate Chunk Vanilla Muffins


I absolutely love these muffins. I made them for the morning of my sister's wedding one week ago. All the bridesmaids would be over, getting themselves beautiful, and my mom and I thought it would be fun to have a little spread of yummy treats. So these muffins were prepared, along with banana chocolate chip cake, individual cups of yogurt, fresh fruit, trail mix, and mimosas. It was lovely!

I wouldn't normally make something called vanilla muffins because it sounds too plain. Sorta like how I never make yellow cake because chocolate cake is always going to be better. :-) But something about Carole Walter's recipe lured me in. Plus, I got to add fancy Valrhona dark chocolate chunks into the batter. These muffins are perfect in both texture and taste. Never question Carole Walter!


Chocolate Chunk Vanilla Muffins
Recipe by Carole Walter in Great Coffee Cakes, Sticky Buns, Muffins, and More

1 1/2 cups all-purpose flour, spooned in and leveled
3/4 teaspoon baking powder
1/2 teaspoon salt
1/4 teaspoon baking soda
1/2 cup (1 stick) unsalted butter, slightly firm
2 teaspoons pure vanilla extract
1 cup granulated sugar
2 large eggs
1/2 cup sour cream
1 (3.5 ounce) bar fine-quality bittersweet chocolate, such as Lindt, cut into 1/4-inch dice
3 to 4 tablespoons sparking sugar, optional

1. Position the rack in the lower third of the oven. Heat the oven to 375 degrees F. Line a muffin pan with paper or foil cupcake liners.

2. In a large bowl, thoroughly whisk together the flour, baking powder, salt, and baking soda. Set aside.

3. Cut the butter into 1-inch pieces and place in the bowl of an electric mixer fitted with the paddle attachment. Add the vanilla and mix on medium speed until smooth and lightened in color, about 1 minute.

4. Add the granulated sugar in four additions and mix for 1 minute longer. Scrape down the side of the bowl. Blend in the eggs, one at a time, and mix for another minute.

5. Reduce the mixer speed to low and add the flour mixture alternately with the sour cream, dividing the dry ingredients into two parts, starting and ending with the flour. Mix just until blended after each addition. When the bowl is removed from the mixer, fold in the chocolate chunks using an oversize rubber spatula.

6. Portion the batter into the prepared pan using a no.16 ice cream scoop (1/4-cup capacity). Sprinkle the top of each muffin with about 1/4 teaspoon of the sparking sugar.

7. Bake for 23 to 25 minutes, or until the muffins are golden brown and the tops are springy to the touch. To ensure even baking, toward the end of baking time, rotate the pans top to bottom and front to back. Remove from the oven and place on a rack to cool.

Storage: Store at room temperature, tightly wrapped in aluminum foil, for up to 3 days. These muffins may be frozen.


Step-by-Step in Pictures

Combine the dry ingredients, then set aside...

Mix the butter and vanilla until smooth and light in color...
Add the sugar and then the eggs...
Add the dry ingredients alternately with the sour cream, ending with dry...

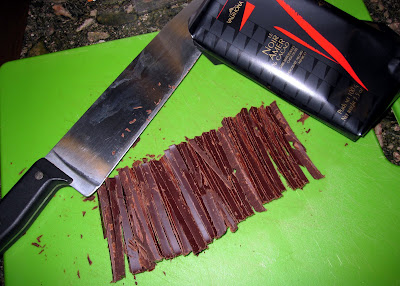
Chop the chocolate with a sharp knife...

You want 1/4-inch chunks...

Fold the chocolate chunks into the batter...

Stop folding as soon as the chocolate is combined...

Distribute evenly in muffin tins...

Bake at 375 degrees F for 23-25 minutes (10-13 minutes if making mini muffins)...

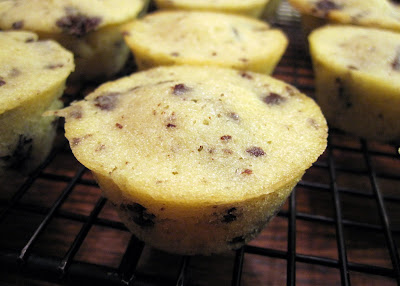
Yum!

Tuesday, August 18, 2009

My Mom, Pastry Chef in the Making

My mom on her very first day apprenticing, about a year ago.
She doesn't look nervous at all!


This coming Sunday, my sister Beth gets married to the love of her life Evan in Woodside, California. My mom has been the main wedding planner and since I know a lot of the nitty gritty details, I cannot wait to see how it all comes together on the big day. It just so happens that my mom retired a little over a year ago from a successful career in physical therapy and later therapy services management. Not waiting long to jump right into her next adventure, she joined the baking team at an amazing bakery in Sunnyvale called Sugar Butter Flour and began apprenticing. She was already an incredible baker, but things are a little different in a commercial kitchen. One time she told me she had to crack 112 eggs! And just yesterday she made 41 cakes. Imagine multiplying a recipe by 16. Be careful to carry the 1 and do your math right!

Well, I just have to share with you something very special she is doing for Beth's wedding. Over the weekend, she and my cousin Rachael spent the day in the bakery kitchen and made about 500 challah rolls to be served with the dinner, and then yesterday my mom baked cake layers that will become the wedding cake. Hopefully, I will get around to posting some of those photos. Having my mom, and cousin, too, personally prepare some of the wedding food is one of the most unique contributions I can think of.

So this is my shout-out to my mom. I am so proud of you for taking on an apprenticeship at a fine baking establishment and putting your education to use for Beth's wedding! You never cease to amaze me.

And thank you, Rachael, for your help with the challah rolls!

Wednesday, July 29, 2009

The Search for the Best Brownie on Earth is Over


I have been on a quest for years to find the best brownie. May sound silly, but I bet every home baker has that same quest without even realizing it. In other words, you make a brownie recipe, decide, eh, could be better, and choose a different recipe next time. Sounds familiar, right? Why would you make the same recipe again if you don't think it's perfect? It's not like brownie recipes are hard to come by. And since I am a baker, my test kitchen is particularly frequently in use. I say all that to say, I've tried a LOT of brownie recipes in my lifetime. Similar to that all-American classic chocolate chip cookie, finding the perfect brownie is a momentous occasion. It's a very big deal. It means no more searching for recipes to test. It means bragging rights that you've discovered the best there is. And it also means a new standard for brownies you didn't know existed but now that you know, you'll be a far pickier eater moving forward.


I am about to reveal to you what I believe is unequivocally, hands down the best brownie, bar none (pun intended! ha!). I suppose you could be grateful to me for all the time I'm saving you, but somehow, I don't think you'll be able to call this the best without first having tried a dozen so-so recipes. I challenge you to go through your cookbooks, make some of the brownies out of them, and then come back to this blog post and make this recipe. Your thank you will be a lot more sincere.

It's worth pointing out, too, that this is a very subjective topic. I must have some chutzpah to call this the best brownie. Who do I think I am? Some people prefer their brownies fudgy, some chewy, some cakey, some dark chocolate, some not so dark, some rich, some less chocolaty, and of course there are those who fight over the edge pieces because they enjoy the crisp sides with the softer center. So to clarify my calling this the Best Brownie on Earth, that is a true statement for me and probably others who like rich, dark, chocolaty, fudgy brownies.

But I admit, making such a bold claim puts it all on the line for me. You might try out this recipe, completely disagree with my superlative of a title, hate the brownie, never trust my judgment again, and never return to Happy Go Marni. I hope that's not the case, in fact, I'm confident after one bite you'll love me forever, but I'm willing to take that risk. Yes, this is the recipe on which I've decided to gamble away my credibility.

The recipe comes from the Tartine cookbook. Tartine is an amazing bakery in San Francisco. Funnily enough, my dad, who has had the Tartine brownie both made in my kitchen and made at the bakery, thinks mine is better (which is saying a lot!). That's probably because the brownie recipe in the Tartine cookbook is not exactly the same as what they sell in the bakery. That, or I do a better job at following their recipe than even they do. Ok, or maybe it's because he's my biased dad. :-)

You'll notice that the recipe calls for a ton of chocolate...and by a ton, I mean a pound. That's right, a whole pound for one 9x13-inch pan. Don't skimp and think you can skip a few ounces. And please don't waste your time on cheap grocery store brands. The chocolate you choose for the recipe ends up defining the brownie. Last time I made these, I spent about $15 on Valrhona chocolate. Only the best for dear old Dad!

Whenever I visit my parents in the Bay Area, I try to whip up a batch to give them. Living near SF, they can have the bakery's version whenever they want, but it's not every day they get the cookbook version specially delivered from L.A.

So without further ado, here's the recipe to this earth-shattering, life-changing brownie. I hope you love it as much as I do.

Updated: I really must give credit where credit is due. A huge shout out and thank you to my Uncle Gary and Aunt Francie who gave me the Tartine cookbook as a birthday present a few years ago. Muah! You two have made my life a whole lot sweeter!


The Best Brownie on Earth
Recipe by Elisabeth Prueitt and Chad Robertson in Tartine

3/4 cup unsalted butter
1 pound bittersweet chocolate, coarsely chopped
3/4 cup + 2 tablespoons all-purpose flour
5 large eggs
2 cups light brown sugar, lightly packed
1/2 teaspoon salt
1 teaspoon vanilla extract

Topping (optional)
2 cups nuts such as walnut or pecan halves

Preheat the oven to 350 degrees F. Butter a 9x13-inch glass baking dish.

In a small saucepan, melt the butter over low heat. Remove from the heat and add the chocolate. If the heat from the butter does not fully melt the chocolate, put the pan back over the heat for 10 seconds and stir until melted. Set aside to cool.

Sift the flour into a small mixing bowl. Set aside. In a medium mixing bowl, combine the eggs, sugar, salt, and vanilla. Using a mixer fitted with the whisk attachment, beat on high speed until the mixture thickens and becomes pale in color and falls from the beater in a wide ribbon that folds back on itself and slowly dissolves on the surface, 4 to 5 minutes. Alternatively, use a mixing bowl and a whisk to beat the ingredients until the mixture falls from the whisk in a wide ribbon. Using a rubber spatula, fold the cooled chocolate into the egg mixture. Add the flour and fold it in quickly but gently with the rubber spatula so that you don't deflate the air that's been incorporated into the eggs.

Pour the batter into the prepared dish and smooth the top with the spatula. If you are using nuts, evenly distribute them across the batter. Bake until the top looks slightly cracked and feels soft to the touch, about 25 minutes. Let cool completely on a wire rack.

Using a sharp knife, cut into 12 squares, or size desired. The brownies will keep in an airtight container in a cool place for up to 1 week.

Kitchen Notes: You can't use a cake tester to judge doneness for these brownies. Becaues the batter has a high percentage of chocolate, the tester comes out wet even if the brownies are done.


Step-by-Step in Pictures

Melt the butter...

Break up a pound of bittersweet chocolate...

Melt the chocolate with the butter...

In a mixer, beat the eggs with the sugar, salt, and vanilla...

Sift the flour and set aside...

Pour the cooled chocolate mixture into the egg/sugar mixture...

Combine...

Gently fold in the flour...

Batter is ready for the oven!

Notice I left a quarter of the pan nut-less for my anti-nut sister...

Best brownie on Planet Earth!
Related Posts with Thumbnails